Define More Precisely, Determine the Angle of Trapezia Teeth of Roughing Hobs for Milling Roughing Straight-Sided Spline Shaft
When we study the hobbing process and design hobs for roughing straight-sided spline shafts we use the following formula to define the angle of trapezia teeth of the hob:
angle a1 = arctga1((S-d x tg(3.141592/z)+
=========================
+ b/cos((3.141592/z))/ 2x h) -- MLG-A.
=========================
But this only a basic formula, and it is used to give us some good possibilities.
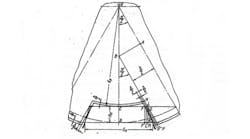
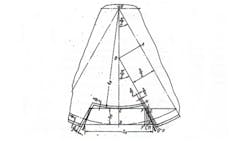
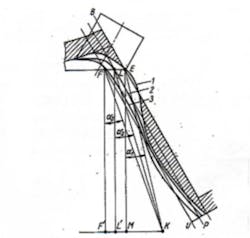
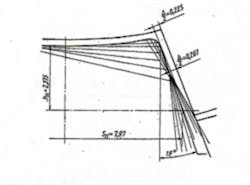
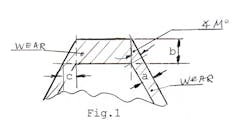
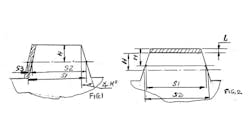
If we put some additional information into the formula we can obtain some different angles of trapezia teeth of the hob, and this hob will make different curves of tolerances. (See sketches 1, 2, 3, 4, and 5.)
This member is tol. = ^/cos(3.141592/z), -- J.W.A.-M.I.
===========
and it has three modiffications:
a. tol. = 0
===========
b. tol. = ^/2x cos(3.141592/z) -- L.U.R.-D.A.
===========
c. tol. = ^/cos(3.141592/z) -- J.W.A.-M.I.
===========
^ is the tolerance for grinding spline.
In the first formula, if we put in the basic 0 we obtain M.L.G.-A.
If we put in the basic formula "b" we obtain a second formula:
angle a2 = arctga2 ((S-dxtg(p/z)+b/cos(p/z) +
===========
+^/2xcos(p/z))/2xh) -- M.I.L.-A.N.,
===========
If we put in basic formula "c" we obtain a third formula:
angle a3 = arctga3((S-dxtg(p/z)+b/cos(p/z)+
===========
+^/cos(p/z))/2xh) -- F.E.R.-I.L.
===========
Now, once a tool-designer has calculated three angles and makes a graphic check, he can make a choice among these variants, determining which is better for his work.
S - hob tooth thickness on the pitch,
d - root diameter of splined shaft,
b - spline thickness nominal,
h - depth from pitch line of tooth,
z - number of splines,
tg (p/z) = tg(3.141592/z x 57.3 degr.)
cos(p/z) = cos(3.141592/z x57.3 degr.)
We take for example a spline shaft D38xd32xb6xz8,
^= 0.45 mm, S = 7.97mm, h = 2.175 mm, 38,32,6 in mm.
D - outside diameter of splined shaft.
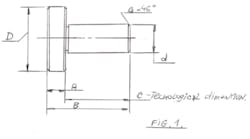
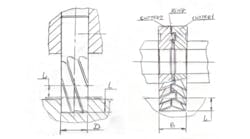
If you look at sketch 1 you will see a general picture of the disposition of the tooth of the hob and splined shaft.
Sketch 2 shows the process of hobbing the spline by teeth a1, a2, a3, and curves 1, 2, and 3 suitably covered the spline.
Sketch 3 shows process of hobbing the spline by teeth with angle a1 = 13 degree, with tolerance for grinding 0.167 mm, which is less than the normal tolerance.
0.225 mm on the one side of the spline, which is made by teeth angle a2 = 16 degr. 10 min. on sketch 4.
Sketch 5 shows the process of hobbing by teeth angle a3 = 19 degrees, with tolerance for grinding ^= 0.267 mm on one side of spline, which is good for a long splined shaft.
Now, the tool-designer can make his decision after completing a graphic check of every variant.
