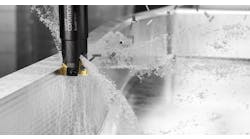
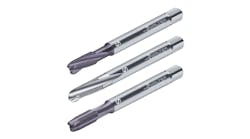
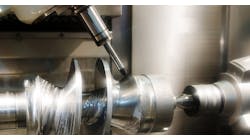
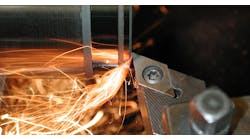
Even with all of the sophisticated equipment and techniques used in today's modern industry, the basic mechanics of forming a chip remain the same. As the cutting tool engages the workpiece, the material directly ahead of the tool is sheared and deformed under tremendous pressure. The deformed material then seeks to relieve its stressed condition by fracturing and flowing into the space above the tool in the form of a chip.
Cutting Tool Forces
The deformation of a work material means that enough force has been exerted by the tool to permanently reshape or fracture the work material. If a material is reshaped, it is said to have exceeded its plastic limit. A chip is a combination of reshaping and fracturing. The deformed chip is separated from the parent material by fracture. The cutting action and chip formation can be more easily analyzed if the edge of the tool is perpendicular to the relative motion of the material. Here, the undeformed chip thickness t1 is the value of the depth of the cut, while t2 is the thickness of the deformed chip after leaving the workpiece. The major deformation starts at the shear zone and diameter determines the angle of shear.
A general discussion of the forces acting in metalcutting is presented by using the example of a typical turning operation. When a solid bar is turned, there are three forces acting on the cutting tool:
Tangential Force: This acts in a direction tangential to the revolving workpiece and represents the resistance to the rotation of the workpiece. In a normal operation, tangential force is the highest of the three forces and accounts for about 98 percent of the total power required by the operation.
Longitudinal Force: Longitudinal force acts in the direction parallel to the axis of the work and represents the resistance to the longitudinal feed of the tool. Longitudinal force is usually about 50 percent as great as tangential force. Since feed velocity is usually very low in relation to the velocity of the rotating workpiece, longitudinal force accounts for only about 1 percent of total power required.
Radial Force: Radial force acts in a radial direction from the center line of the workpiece. The radial force is generally the smallest of the three, often about 50 percent as large as longitudinal force. Its effect on power requirements is very small because velocity in the radial direction is negligible.
Chip Formation and Tool, Wear
Regardless of the tool being used or the metal being cut, the chip forming process occurs by a mechanism called plastic deformation. This deformation can be visualized as shearing. That is when a metal is subjected to a load exceeding its elastic limit. The crystals of the metal elongate through an action of slipping or shearing, which takes place within the crystals and between adjacent crystals.
Most practical cutting operations, such as turning and milling, involve two or more cutting edges inclined at various angles to the direction of the cut. However, the basic mechanism of cutting can be explained by analyzing cutting done with a single cutting edge.
Chip formation is simplest when a continuous chip is formed in orthogonal cutting. In oblique cutting, a single, straight cutting edge is inclined in the direction of tool travel. This inclination causes changes in the direction of chip flow up the face of the tool. When the cutting edge is inclined, the chip flows across the tool face with a sideways movement that produces a helical form of chip.
Typical turning operation showing the forces acting on the cutting tool.
Chip Formation
Metalcutting chips have been classified into three basic types:
Discontinuous Chip - Type 1: Discontinuous or segmented chips are produced when brittle metal such as cast iron and hard bronze are cut or when some ductile metals are cut under poor cutting conditions. As the point of the cutting tool contacts the metal, some compression occurs, and the chip begins flowing along the chip-tool interface. As more stress is applied to brittle metal by the cutting action, the metal compresses until it reaches a point where rupture occurs and the chip separates from the unmachined portion. This cycle is repeated indefinitely during the cutting operation, with the rupture of each segment occurring on the shear angle or plane. Generally, as a result of these successive ruptures, a poor surface is produced on the workpiece.
Continuous Chip - Type 2: The Type 2 chip is a continuous ribbon produced when the flow of metal next to the tool face is not greatly restricted by a built-up edge or friction at the chip tool interface. The continuous ribbon chip is considered ideal for efficient cutting action because it results in better finishes. Unlike the Type I chip, fractures or ruptures do not occur here, because of the ductile nature of the metal.
Continuous Chip with a Built-up Edge (BUE) - Type 3: The metal ahead of the cutting tool is compressed and forms a chip which begins to flow along the chip-tool interface. As a result of the high temperature, the high pressure, and the high frictional resistance against the flow of the chip along the chip-tool interface, small particles of metal begin adhering to the edge of the cutting tool while the chip shears away. As the cutting process continues, more particles adhere to the cutting tool and a larger build-up results, which affects the cutting action. The built-up edge increases in size and becomes more unstable. Eventually a point is reached where fragments are tom off. Portions of these fragments which break off stick to both the chip and the workpiece. The build-up and breakdown of the built-up edge occur rapidly during a cutting action and cover the machined surface with a multitude of built-up fragments. These fragments adhere to and score the machined surface, resulting in a poor surface finish.
Shear Angle: Certain characteristics of continuous chips are determined by the shear angle. The shear angle is the plane where slip occurs to begin chip formation.
Regardless of the shear angle, the compressive deformation caused by the tool force against the chip will cause the chip to be thicker and shorter than the layer of workpiece material removed. The work or energy required to deform the material usually accounts for the largest portion of forces and power involved in a metal removing operation. For a layer of work material of given dimensions, the thicker the chip, the greater the force required to produce it.
Heat in Metalcutting: The mechanical energy consumed in the cutting area is converted into heat. The main sources of heat are: the shear zone, the interface between the tool and the chip where the friction force generates heat, and the lower portion of the tool tip which rubs against the machined surface. The interaction of these heat sources, combined with the geometry of the cutting area, results in a complex temperature distribution.
Cutting Tool Wear
Cutting tool life is one of the most important economic considerations in metalcutting. In roughing operations, the tool material, the various tool angles, cutting speeds, and feed rates are usually chosen to give an economical tool life. Conditions giving a very short tool life will not be economical because tool-- grinding, indexing, and tool replacement costs will be high. On the other hand, the use of very low speeds and feeds to give long tool life will not be economical because of the low production rate. Clearly any tool or work material improvements that increase tool life without causing unacceptable drops in production will be beneficial. To form a basis for such improvements, efforts have been made to understand the behavior of the tool, how it physically wears, the wear mechanisms, and forms of tool failure.
The different wear mechanisms, as well as the different phenomena contributing to the attritious wear of the cutting tool, are dependent on the multitude of cutting conditions and especially on the cutting speeds and cutting fluids.
Aside from the sudden premature breakage of the cutting edge (tool failure), there are several indicators of the progression of physical wear. The machine operator can observe these factors prior to total rupture of the edge. The indicators are:;
• Increase in the flank wear size above a predetermined value;
• Increase in the crater depth, width or other parameter of the crater, in the rake face;
• Increase in the power consumption, or cutting forces required to perform the cut;
• Failure to maintain the dimensional quality of the machined part within a specified tolerance limit;
• Significant increase in the surface roughness of the machined part;
• Change in the chip formation due to increased crater wear or excessive heat generation.
Single-Point Cutting Tools
The metalcutting tool separates chips from the workpiece in order to cut the part to the desired shape and size. There is a great variety of metal cutting tools, each of which is designed to perform a particular job or a group of metal cutting operations in an efficient manner.
Cutting Tool Geometry
The shape and position of the tool, relative to the workpiece, have an important effect on metalcutting. The most important geometric elements, relative to chip formation, are the location of the cutting edge and the orientation of the tool face with respect to the workpiece and the direction of cut. Other shape considerations are concerned primarily with relief or clearance, i.e., taper applied to tool surfaces to prevent rubbing or dragging against the work.
Terminology used to designate the surfaces, angles and radii of single point tools, is shown below. The tool shown here is a brazed-tip type, but the same definitions apply to indexable tools.
The Rake Angle: The basic tool geometry is determined by the rake angle of the tool. The rake angle is always at the top side of the tool. With the tool tip at the center line of the workpiece, the rake angle is determined by the angle of the tool as it goes away from the workpiece center line location. The neutral, positive, and negative rakes are seen below. The angle for these geometries is set by the position of the insert pocket in the toolholder. The positive/negative (d) and double positive (e) rake angles are set by a combination of the insert pocket in the tool holder and the insert shape itself.
There are two rake angles: back rake and side rake. In most turning and boring operations, it is the side rake that is the most influential. This is because the side rake is in the direction of the cut.
Rake angle has two major effects during the metalcutting process. One major effect of rake angle is its influence on tool strength. An insert with negative rake will withstand far more loading than an insert with positive rake. The cutting force and heat are absorbed by a greater mass of tool material, and the compressive strength of carbide is about two and one half times greater than its transverse rupture strength.
The other major effect of rake angle is its influence on cutting pressure. An insert with a positive rake angle reduces cutting forces by allowing the chips to flow more freely across the rake surface.
Negative Rake: Negative rake tools should be selected whenever workpiece and machine tool stiffness and rigidity allow. Negative rake, because of its strength, offers greater advantage during roughing, interrupted, scaly and hard-- spot cuts. Negative rake also offers more cutting edges for economy and often eliminates the need for a chipbreaker. Negative rakes are recommended on insert grades which do not possess good toughness (low transverse rupture strength).
Negative rake is not, however, without some disadvantages. Negative rake requires more horsepower and maximum machine rigidity. It is more difficult to achieve good surface finishes with negative rake. Negative rake forces the chip into the workpiece, generates more heat into the tool and workpiece, and is generally limited to boring on larger diameters because of chip jamming.
Positive Rake: Positive rake tools should be selected only when negative rake tools can't get the job done. Some areas of cutting where positive rake may prove more effective are, when cutting tough, alloyed materials that tend to "work-harden," such as certain stainless steels, when cutting soft or gummy metals, or when low rigidity of workpiece, tooling, machine tool, or fixture allows chatter to occur. The shearing action and free cutting of positive rake tools will often eliminate problems in these areas.
One exception that should be noted when experiencing chatter with a positive rake is, that at times the preload effect of the higher cutting forces of a negative rake tool will often dampen out chatter in a marginal situation. This may be especially true during lighter cuts when tooling is extended or when the machine tool has excessive backlash.
Neutral Rake: Neutral rake tools are seldom used or encountered. When a negative rake insert is used in a neutral rake position, the end relief (between tool and workpiece) is usually inadequate. On the other hand, when a positive insert is used at a neutral rake, the tip of the insert is less supported, making the insert extremely vulnerable to breakage.
Positive/Negative Rake: The positive/negative rake is generally applied using the same guidelines as a positive rake. The major advantages of a positive/negative insert are that it can be used in a negative holder, it offers greater strength than a positive rake, and it doubles the number of cutting edges when using a two-sided insert.
The positive/negative insert has a ten-degree positive rake. It is mounted in the normal five-degree negative pocket which gives it an effective five-degree positive rake when cutting. The positive/negative rake still maintains a cutting attitude which keeps the carbide under compression and offers more mass for heat dissipation. The positive/negative insert also aids in chip breaking on many occasions, as it tends to curl the chip.
Double Positive Rake: The double positive insert is the weakest of all inserts. It is free cutting, and generally used only when delicate, light cuts are required which exert minimum force against the workpiece, as in the case of thin wall tubing, for example. Other uses of double positive inserts are for very soft or gummy work materials, such as low carbon steel and for boring small diameter holes when maximum clearance is needed.
Side Rake Angles: In addition to the back rake angles there are side rake angles. These angles are normally determined by the tool manufacturers. Each manufacturer's tools may vary slightly, but usually an insert from one manufacturer can be used in the tool holder from another. The same advantage of positive and negative geometry that was discussed for back rake, applies to side rake. When back rake is positive so is side rake and when back rake is negative so is side rake.
Side and End Relief Angles: Relief angles are for the purpose of helping to eliminate tool breakage and to increase tool life. The included angle under the cutting edge must be made as large as practical. If the relief angle is too large, the cutting tool may chip or break. If the angle is too small, the tool will rub against the workpiece and generate excessive heat, and this will in turn, cause premature dulling of the cutting tool.
Small relief angles are essential when machining hard and strong materials, and they should be increased for the weaker and softer materials. A smaller angle should be used for interrupted cuts or heavy feeds, and a larger angle for semi-finish and finish cuts.
Lead Angle: Lead angle is determined by the toolholder, which must be chosen for each particular job. The insert itself can be used in any appropriate holder, for that particular insert shape, regardless of lead angle.
Lead angle is an important consideration when choosing a tool holder. A positive lead angle is the most commonly used and should be the choice for the majority of applications. Positive lead angle performs two main functions:
• It thins the chip
• It protects the insert.
The undeformed chip thickness decreases when using a positive lead angle.
Positive lead angles vary, but the most common lead angles available on standard holders are 10, 15, 30 and 45 degrees.
Positive lead angle also reduces the longitudinal force (direction of feed) on the workpiece. But positive lead angle increases the radial force because the cutting force is always approximately perpendicular to the cutting edge. This may become a problem when machining a workpiece that is not well supported. Care must be taken in cases where an end support, such as a tail stock center is not used.
A heavy positive lead angle also has a tendency to induce chatter because of a greater tool contact area. This chatter is an amplification of tool or workpiece deflection resulting from the increased contact. In this situation it is appropriate to decrease the positive lead angle.
A positive lead angle protects the tool and promotes longer tool life. The tool comes in contact with the workpiece well away from the tip, which is the weakest point of the tool. As the tool progresses into the cut, the load against the tool gradually increases, rather than occurring as a sudden shock to the cutting edge. The positive lead angle also reduces the wear on the cutting edge caused by a layer of hardened material or scale, by thinning the layer and spreading it over a greater area. These advantages are extremely beneficial during interrupted cuts. Another way that positive lead angle helps to extend tool life is by allowing intense heat buildup to dissipate more rapidly, since more of the tool is in contact with the workpiece.
Neutral and negative lead angle tools also have some benefits. A neutral angle offers the least amount of tool contact, which will sometimes reduce the tendency to chatter, and lowers longitudinal forces. This is important on less stable workpieces or set-ups. Negative lead angles permit machining to a shoulder or a corner and are useful for facing. Cutting forces tend to pull the insert out of the seat, leading to erratic size control. Therefore, negative lead angles should be avoided if at all possible.
Edge Preparation
Edge preparation is a step taken to prolong tool life or to enhance tool performance. There are four basic approaches to edge preparation:
Edge Hone: The edge hone is by far the most commonly used edge preparation. Many inserts are automatically provided with an edge hone at the time of purchase, especially larger inserts that will be exposed to heavy cutting. An edge hone on a ground or precision insert must usually be specially requested. It is standard practice of all manufacturers to hone inserts that are to be coated before the inserts are subjected to the coating process. The reason for this is that during the coating process, the coating material tends to build up on sharp edges. Therefore, it is necessary to hone those edges to prevent build-up.
"L" Land: The "L" land edge preparation adds strength to the cutting edge of an insert. Essentially, the "L" land amplifies the advantages of negative rake by diverting a greater amount of cutting force into the body of the insert. An "L" land is normally used only on negative, flat top inserts placed at a negative rake angle. To use an "L" land on a positive or a positive/negative insert would defeat the purpose of positive cutting action.
Chamfer: A chamfer is a compromise between a heavy hone and an "L" land. A chamfer will also increase an insert's resistance to chipping and breaking. In a shop situation a chamfer is easier and quicker to apply than a heavy hone, because it can be applied with a grinder rather than a hand hone.
Combinations: Any time that a sharp edge can be eliminated the life of an insert will likely be extended. When an "L" land or chamfer is put on an insert, it will make a dramatic improvement in performance, but the "L" land or chamfer will leave some semi-sharp corners. To get the maximum benefit from an "L" land or chamfer, it will help to add a slight hone to each semi-sharp corner. This will be of significant value in extending tool life, particularly when a large "L" land is used.
Nose Radius: The nose radius of an insert has a great influence in the metalcutting process. The primary function of the nose radius is to provide strength to the tip of the tool. Most of the other functions and the size of the nose radius are just as important. The choice of nose radius will affect the results of the cutting operation; however, inserts are provided with various standard radii and, in most cases, one of these will meet each specific cutting need.
The larger the radius, the stronger the tool tip will be. However, a large radius causes more contact with the work surface and can cause chatter. The cutting forces will increase with a large radius for the same reason: increased contact with the work surface. When taking a shallow cut, a depth approximately equal to the radius or less, the radius acts as a positive lead angle, thinning the chip. A large radius will allow the cutting heat to dissipate more quickly into the insert body, reducing the temperature build-up at the cutting edge.
One of the most important influences of a large radius is that of surface finish. The larger the radius, the better the surface finish will be at an equal feedrate. A larger radius will allow a faster feedrate and yet obtain a satisfactory finish. During a finishing cut, the feedrate should not exceed the radius if a reasonable surface finish is required.
Chip Breakers
Breaking the chip effectively when machining with carbide tools is of the utmost importance, not only from the production viewpoint, but also from the safety viewpoint. When machining steel at efficient carbide cutting speeds, a continuous chip flows away from the work at high speed.
With the advent of numerical control (NC) machining and automatic chip handling systems, the control of chips is becoming more important than ever. The control of chips on any machine tool, old or new, helps to avoid jam-ups with tooling and reduces safety hazards from flying chips.
There are two basic types of chip control being used with indexable insert tooling: the mechanical chip breaker and the sintered chip breaker. Mechanical chip breakers are not as commonly used as sintered chip breakers. There are more parts involved with the mechanical chip breaker, which increases the cost, and the chip breaker hampers changing and indexing the insert. However, mechanical chip breakers are extremely effective in controlling chips during heavy metal removing operations.
Examining the chips that are coming off a workpiece will give a lot of information as to how well the job is going, how tool wear is progressing, and why premature tool failure or short tool life is occurring.
Straight Chips: Straight chips are usually the most troublesome. They string out all over the machine tool, they get snarled in the tool, workpiece, and fixturing, they cause tooling to break, they jam up chip-handling equipment, they are difficult to remove, and they are dangerous, especially when they begin to whip around. Soft gummy low carbon and tough steels usually cause this type of chip. One of the quickest ways to eliminate the straight chip is to increase the feedrate, because a thicker chip breaks more easily.
Snarling Chips: Snarling chips are continuous chips much the same as straight chips. They are generally caused by the same conditions as straight chips and create the same problems. It stands to reason, therefore, that to correct a snarling chip situation, the same methods would be used as with straight chips. In addition, cooling the chips with a flood or mist coolant as they come off the tool will frequently help to break them.
Infinite Helix Chips: Infinite helix chips are chips that are near the breaking point. The problems this type of chip creates are similar to those created by straight chips. Infinite helix chips are common when machining very ductile material, such as leaded or resulfurized steels, and other soft materials.
Full Turn Chips: Full turn chips are not usually a problem so long as they are consistent and without occasional stringers. A consistent full turn chip is near the ideal half turn chip.
Half Turn Chip: If there is such a thing as a perfect chip, it is the half turn or "6" shape chip. This is the chip shape that the machinist strives for in his cutting operation. The half turn chip is known as the classic chip form.
Tight Chips: Tight chips do not present a problem from a handling or inter-facing point of view, but these tight chips are a sign that poor tool life or premature tool failure may occur. The tight chip is formed by very high pressure and causes intense heat, deflection of the tool and workpiece, and rapid tool failure. A tight chip is a jammed chip, meaning that its flow path is overly restricted. Causes include: too high a feedrate, too negative a rake angle, improper chip breaker selection or setting, or a worn insert.
Indexable Type Tooling
One of the more recent developments in cutting tool design is the indexable insert, which is mechanically held in a toolholder. Inserts are available in several thicknesses and a variety of sizes and shapes. The round, square, triangle, and diamond account for the greatest percentage. Many other shapes, including the parallelogram, hexagon, and pentagon, are used to meet specific machining requirements. Each shape has its advantages and limitations since the operational, as well as the economical factors must be considered in tooling selection.
Indexable Insert Shapes
Indexable inserts have certainly established their position and potential in the metalworking industry. The elimination of regrinding, accuracy of tool geometry, reduced inventory tool costs, and down time for tool changes, are some of the advantages resulting from the use of this tooling.
There are four basic shapes and a variety of special shapes. Because approximately 95 percent of all machining is done with the four basic shapes, these are the ones of interest here. The four basic shapes are: square, triangle, diamond, and round.
These shapes are available in many different configurations for almost any job. Each shape can be obtained for positive, negative, or positive/negative rake, with or without chip breaker grooves, with or without holes, with various edge preparations, in various tolerances, and in various radii and sizes.
Choosing a particular shape or insert requires a great deal of planning and thought. The choice of insert shape must be based on such factors as the workpiece configuration and tolerance, workpiece material, amount of material to be removed, machine tool capability and economics.
Indexable Insert Identification System
A standard marking system, proposed by the Cemented Carbide Producers Association and approved by the American National Standards Institute (ANSI) has been adopted by the cemented carbide manufacturers. A new identification and numbering system became necessary, due to the addition of an expanded range of types and sizes of inserts incorporating a wide variety of detail. Under this new system, the insert number, with the manufacturer's grade of carbide, is all that is needed to describe the insert.
Insert Economics: The cost of carbide and other tool materials as well as the cost of preparing these materials into cutting tools is relatively high and continuing to increase. Therefore, it is most important to choose tool inserts wisely. Here are some important things to consider when making the choice:
• Chose a shape that offers the most cutting edges.
• Choose an IC appropriate to the amount of material to be removed.
• Choose an insert tolerance that is appropriate to the job being done. In most cases an unground utility grade will do the job. The closer the tolerance, the higher the cost. Tight insert tolerances are normally required only when the indexability of an insert is critical.
• Choose a single-sided insert when conditions make its efficiency more economical.
Mechanical Toolholders
The revolution of the indexable insert has resulted in the availability of a wide range and variety of toolholders.
To select or recommend the best holder for every machining application would be a formidable task. The practice in many manufacturing plants is to standardize on one or two designs, so that a minimum of repair parts and accessories need to be carried in inventory. There are basic designs and construction elements common to all holders: the shank, the seat, and the clamp or locking device.
George Schneider, Jr., is the author of Cutting Tool Applications, a handbook to machine tool materials, principles, and designs. He is the Professor Emeritus of Engineering Technology at Lawrence Technological University, and former Chairman of the Detroit Chapter of the Society of Manufacturing Engineers.
