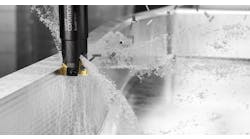
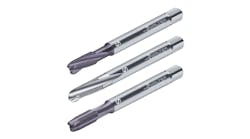
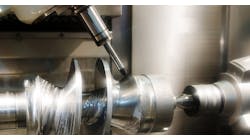
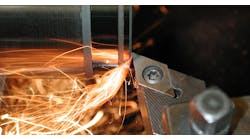
Grooving and threading are both single-point machining operations performed on lathes, automatic lathes, or machining centers.
Grooving or Recessing Operations
Grooving or recessing operations, sometimes also called necking operations, are often done on workpiece shoulders to ensure the correct fit for mating parts. When a thread is required to run the full length of the part to a shoulder, a groove is usually machined to allow full travel of the nut. Grooving the workpiece prior to cylindrical grinding operations allows the grinding wheel to completely grind the workpiece without touching the shoulder.
Face Grooving
With face grooving operations the tool is fed axially rather than radially toward the end surface of the workpiece. The tool must be adapted to the radial curve of the groove and the blade is therefore curved. When the machine spindle rotates in a counter-clockwise direction, a right-hand version of the tool is used and a left-hand version is used when the machine spindle rotates clockwise.
So that both insert and toolholder fit into the groove, both the outer and inner diameters of the groove must be considered. The diameter measured to the outside of the blade determines the limit for the smallest possible diameter which can be machined, and the diameter measured to the inside of the blade determines the limit for the largest possible groove diameter.
Internal Grooving
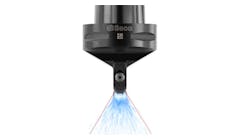
The main problem with internal grooving is chip evacuation. There is a very high risk of chip jamming which can result in tool breakage, especially when machining small diameters. The chips have to be removed from the groove then change direction 90 degrees and pass the side of the toolholder to finally be removed from the hole. Introducing intermittent feed into the program is the best way to obtain short chips. An internal grooving holder with insert is shown above.
Vibration is another common problem associated with internal grooving. Stability is related to the overhang, or how far into the workpiece the groove is to be machined. The risk of vibration is reduced by using the largest toolholder possible. The overhang should not exceed two to two-and-a-half times the diameter. Internal grooving is a critical operation and it is important to choose a tool which optimizes chip evacuation with vibration-free machining.
Grooving tools are usually ground to the dimensions and shape required for a particular job. Most grooving tools are similar in appearance to the cutoff tool, except that the corners are carefully rounded because they reduce the possibility of cracks in the part, especially if the part is to be heat-treated.
Parting or Cutoff Operations
In parting operations the workpiece rotates while the tool carries out a radial feed movement. As with face turning, the tool is fed from the periphery of the workpiece toward the center and the cutting speed is reduced to zero — but here the similarities end.
As the cutting tool progresses toward the center, another factor takes effect. As the diameter of the workpiece is reduced, the radial cutting force will cause the material to break before the insert has cut through it. This results in a pip or burr being formed in the center of the workpiece. This pip will always be there after parting, but its size can be reduced by choosing the correct insert geometry, feedrate, and support for the sagging workpiece.
In a parting operation, there is material on both sides of the insert. This means that the tools used are narrow and that the length of the toolholder increases with an increased diameter. Therefore, stability becomes a critical factor.
Since the size of the tool and toolholder must be optimized to meet requirements, only a small surface is present for drawing off heat, and therefore cutting fluid becomes important. Unfortunately, because of the space restrictions, the supply of cutting fluid is obstructed by the chips. Since chip evacuation is difficult and there is nothing against which to break the chips, the side surfaces can easily be damaged during the operation.
Insert Geometry
At the beginning of a cut the insert will work at a relatively high cutting speed, and must be able to resist plastic deformation. The speed reduces as the tool approaches the center, at which point it becomes zero.
Modern machines can be programmed so that the spindle speed is automatically increased towards the center, so that the cutting speed is kept constant. But the maximum spindle speed of the machine will be reached before the tool reaches the center, and this could result in insert edge build-up. Therefore, a tough tool material will be needed to resist edge build-up as the tool gets closer to the center.
Advanced insert geometries are necessary for performing parting and grooving operations in a satisfactory way. A positive-rake insert gives lower cutting forces and thus lower pressure on the workpiece, and this will reduce the size of the pip. However, a large positive rake angle means a weaker cutting edge.
The insert can have various lead angles. On straight or neutral inserts the lead angle is zero. This design provides a stronger cutting edge and a better surface finish, while maintaining closer tolerances with respect to perpendicular alignment. With an increased lead angle the axial cutting force increases, causing the insert to deflect.
With large lead angles the deflection can be so strong that a rounding of the end surfaces occurs and results in a convex or a concave end surface. A reduced lead angle produces larger radial cutting forces but this can cause vibration problems especially when small diameters are machined. In grooving operations a radial displacement of the insert results in an inaccurate groove depth.
Chip Control
With parting and grooving operations, the insert has machined surfaces on both sides of the feed direction. Therefore, the chips must be formed in such a way that they are narrower than the groove, otherwise the surfaces can be damaged. In addition, the chips must be formed in such a way that they can be evacuated from the groove without disrupting the, machining with long, unwieldy chip coils. Therefore the chips are formed in two directions: bent across their width and rolled together longitudinally to form a spiral spring-shaped chip. The illustration at left shows three chip control inserts.
To produce this ideal chip shape the insert is usually provided with a chip former, which takes into account both the machining conditions and the workpiece material. It is shaped in such a way as to form a bank that the chips can climb against during machining. After a number of revolutions the chips will break automatically. The diameter of the spiral spring chips is influenced by the width of the insert, the height of the bank, the feed, and the workpiece material.
Tool Positioning
As with conventional turning, it is important that the cutting edge be positioned on the same level as the centerline. To achieve satisfactory results, a maximum deviation in positioning of only ±0.004 in. from the center line is acceptable.
As the cutting edge deviates from the center line, the rake angle and the clearance angle will be changed. This change is due to the radius of the workpiece. A clearance angle that is too small may cause the cutting edge to rub against the workpiece. If the cutting edge is positioned too low, the tool will leave material in the center and a pip will be formed.
Operational Stability
With conventional external turning the tool overhang is not affected by the length of the workpiece. The size of the toolholder can be chosen so that it withstands the stresses which arise during the operation. However, with parting and grooving operations, consideration must be given to the depth of insertion and the width of the groove, which means that stability must often be compromised to meet specifications.
To obtain the best possible stability, the overhang should be as small as possible, so a holder for the shortest possible insertion depth should be chosen. Wider inserts can be used in order to improve the stability, but more material is wasted in the form of chips. This can be expensive with large batches and when machining expensive materials.
Vibration can also arise as a result of the deflection of the workpiece. The closer the chuck is to the parting position, the lower the effect of the stresses and the deflection of the workpiece will be. Therefore, if a workpiece has a tendency to vibrate, the machining should be done as close to the chuck as possible.
The risk of vibration must be kept to a minimum in order to obtain acceptable results in quality and tool life. In addition to choosing the best tool and most stable set up, the cutting data must be adapted to minimize the tendency of the tool and workpiece to vibrate.
Toolholder and Insert Selection
Modern parting and grooving cutting tools consist of a toolholder and an indexable insert developed specifically for a particular operation. The majority of inserts produced over the last decade were designed to work with the SELF-GRIP concept. This clamping method incorporates no external screws or levers to hold the insert in place as shown below. Instead, it relies on the rotation of the part and tool pressure to keep the insert seated in a wedge-style pocket. The inserts designed for this type of holder are usually single ended and their geometry permits unlimited depth of cut.
With double-ended inserts, also known as "dogbones," the depth of cut is limited by the second cutting edge as shown at lower right. Dogbone inserts traditionally can only cut as deep as the overall length of the insert. Once the depth is reached, the trailing edge will begin to rub inside the groove that the tool is creating. In addition, dogbone inserts usually are secured by a screw-top clamp, which also limits the depth of cut.
Coatings for grooving and parting inserts vary from supplier to supplier. But titanium carbon nitride process has practically become the industry standard for lower cutting speeds and tougher applications.
And when conditions are stable and higher cutting speeds are required, the choice narrows to titanium-aluminum-nitride coatings applied by the PVD process, or the newer medium-temperature CVD process. The reason is because TiAIN acts as a good heat barrier for the carbide substrate and can handle elevated temperatures.
Grooving and Parting Recommendations
The ability to efficiently cut off work-pieces and blanks in lathes has always been important in getting the job completed. Even in special purpose cutoff machines, a good parting tool is at the heart of the operation. Today's modern indexable insert parting and grooving tools provide the same productivity levels as modern turning tools.
In parting operations, the objective is to separate one part of the workpiece from the other as efficiently and reliably as possible. In grooving operations, the principle is the same, although these operations are less sensitive because the grooves are usually not as deep. In grooving, the shape, accuracy and surface finish are the main requirements that must be met.
Some important hints for applying grooving and parting tools:
• Always use plenty of cutting fluid.
• Set the center-height of the cutting edge accurately.
• Make sure toolholder/blade is accurately positioned at 90 degrees to the workpiece axis.
• Use toolholder with the shortest possible length of insertion for the operation in question.
• Select the largest shank/bar for the tool.
• Adapt the cutting speed to avoid vibrations.
• Reduce the feedrate for the final part when parting-off bar material/components.
• For axial grooving, make the first plunging cut at the largest diameter, farthest out on the face, to minimize the risk of chip jamming.
• Use the smallest possible lead angle for avoiding pips/burrs in parting-off.
• When possible, use a toolholder with a strengthening radius between shank and blade.
Screw Threads and Threading
The screw thread dates back to 250 B.C, when it was invented by Archimedes. For centuries wooden screws, handmade by skilled craftsmen, were used for wine presses and carpenters' clamps throughout Europe and Asia. Precision in screw and thread manufacture did not come into being until the screw cutting lathe was invented by Henry Maudslay in 1797.
In the early 1800's, Maudslay also began to study the production of uniform and accurate screw threads. Until then no two screws were alike; manufacturers made as many threads per inch on bolts and nuts as suited their own needs. For example, one manufacturer made 10 threads per inch in 1/2 in.- diameter threaded parts, whereas another made 12 threads, and so forth. During this period the need for thread standards became acute.
Despite many attempts at standardization, it was not until World War I that thread standards were developed. The thread profile was designated the American National thread form and was the principal type of thread manufactured in the United States until World War II.
During World War II the United States manufactured military equipment that used the American National thread form, which presented interchangeability problems with machinery made in Canada and Great Britain. Not until after World War II in 1948, did these countries agree upon a Unified thread form to provide interchangeability of threaded parts. The Unified thread form is essentially the same as the old American National, except that it has a rounded root and either a rounded or flat crest. The Unified thread form is mechanically interchangeable with the former American National threads of the same diameter and pitch. Today it is the principal thread form manufactured and used by the United States.
Screw Thread Nomenclature
Screw threads have many dimensions. It is important in modern manufacturing to have a working knowledge of screw thread terminology to identify and calculate the dimensions correctly.
The major diameter is the largest diameter of the screw thread. On an external thread it is the outside diameter; on an internal thread it is the diameter at the bottom or root of the thread.
The minor diameter is the smallest diameter of a screw thread. On an external thread, the minor diameter is at the bottom of the thread; on an internal thread the minor diameter is the diameter located at the crest.
The pitch diameter is an imaginary diameter that passes through the threads at the point where the widths of the groove and the thread are equal. The pitch diameter is the most important dimension on a screw thread; it is the basis from which all thread measurements are taken.
The root is the bottom surface connecting two sides of a thread. The crest is the top surface connecting two sides of a thread. Pitch is the linear distance from corresponding points on adjacent threads. The pitch is equal to I divided by the total number of threads per inch (P = l/[number of threads/in.]). A screw having a single lead with 16 threads per inch has a pitch equal to 1/16 in., commonly referred to as a "16-pitch thread."
The lead is the axial distance a threaded part advances in one complete rotation. On a single lead threaded part, the lead is equal to the pitch.
The depth is the distance, measured radially, between the crest and the root of a thread. This distance is often called the depth of thread.
The flank is the side of the thread. Thread angle is the angle between the flanks of the thread. For example, Unified and Metric screw threads have a thread angle of 60 degrees. Helix is the curved groove formed around a cylinder or inside a hole.
A right-handed thread is a screw thread that requires right-hand or clockwise rotation to tighten it. A left-handed thread is a screw thread that requires left-hand or counterclockwise rotation to tighten it. Thread fit is the range of tightness or looseness between external and internal mating threads. Thread series are groups of diameter and pitch combinations that are distinguished from each other by the number of threads per inch applied to a specific diameter. The two common thread series used in industry are the coarse and fine series, specified as UNC and UNF.
Unified Thread Form
The Unified screw thread has a 60-degree thread angle with a rounded root and a crest that is flat or rounded. As mentioned earlier, this is the principal thread form used for screw thread fasteners used in the United States. The Unified screw thread system includes six main thread series:
1. Unified Coarse (UNC)
2. Unified Fine (UNF)
3. Unified Extra-Fine (UNEF)
4. Unified 8-Pitch (8 UN)
5. Unified 12-Pitch (12 UN)
6. Unified 16-Pitch (16 UN)
The coarse-thread series (UNC) is one of the more commonly used series on nuts, bolts, and screws. It is used when lower-tensile-strength materials (aluminum, cast iron, brass, plastics, etc.) require threaded parts. Coarse threads have a greater depth of thread and are required on these types of materials to prevent stripping the internal threads.
The fine-thread series (UNF) is used on higher-tensile-strength materials where coarse threads are not required. Because they have more threads per inch, they are also used where maximum length of engagement between the external and internal threads is needed.
The extra-fine thread series (UNEF) is used when even greater lengths of engagement are required in thinner materials. Eight-, 12 -and 16-pitch threads are used on larger-diameter threads for special applications. The 8-pitch is generally regarded as a coarse thread for larger diameters, 12 pitch is the fine series, and 16 pitch is the extra-fine thread used on the larger-diameter threads.
The relationship between the pitch diameter or major diameter determines the helix angle of that thread. For example, a 12-pitch (12 UN) thread with a 1.250 in. major diameter will have a greater helix angle than a 12-pitch thread with a 2.0 in. major diameter. Generally speaking, the lower the helix angle, the greater the tensile stress applied to the bolt for a given torque applied to the nut. The fastener with a lower helix angle will also resist vibration and loosening more effectively.
A grooving and threading holder is shown at bottom left and various grooving and threading inserts are shown below.
Acme Screw Threads
Acme screw threads are manufactured for assemblies that require the carrying of heavy loads. They are used for transmitting motion in all types of machine tools, jacks, large C-clamps and vises. The Acme thread form has a 29-degree thread angle and a large flat at the crest and root.
Acme screw threads were designed to replace the Square thread, which is difficult to manufacture.
There are three classes of Acme threads (2G, 3G, and 4G), each having clearance on all diameters to provide for free movement. Class 2G threads are used on most assemblies. Classes 3G and 4G are used when less backlash or looseness is permissible, such as on the lead screw of a lathe or the table screw of a milling machine.
Tapered Pipe Threads
Pipe threads, usually designated NPT (National Pipe Taper) are tapered threads used for sealing threaded joints such as water and air pipes. Most pipe threads have a slight taper (3/4 in./ft) and are cut using special pipe taps and dies. Pipe threads can also be machined using the taper attachment on an engine lathe.
Thread Turning
Development of threading tools has come a long way since the days of high speed tool-bits and tips ground to shape, which were then slowly fed along by the lathe lead screw. Most of today's threading is performed by indexable insert tools as part of a very rapid CNC process. What used to be a relatively difficult and time-consuming part of machining is now standard procedure as with any other operation. A typical part that requires a thread is routinely machined with fixed cycles of numerical control and a variety of other machine mechanisms and using tools that have the right thread shape.
The principle of single-point thread cutting is the feed movement of the tool in relation to the workpiece rotation. The point generates the typical spiral groove that makes up the screw thread with a certain pitch. Basically, threading is a well-coordinated turning operation with a form-tool. During the feed passes, the tool is moved longitudinally along the workpiece and then withdrawn and moved back to the starting position for the next pass along the same thread groove.
The feedrate is a key factor that has to coincide with the pitch of the thread. The coordination is obtained by various means, depending on the type of machine; lead screw, cam or numerical control (usually handled as a sub-routine in CNC). The shape of the groove produced is determined by the shape of the insert point, and the feed rate is considerably higher than for ordinary turning operations.
The relatively small, 60-percent point angle of the tool makes the cutting edge susceptible to the forces and stresses of metal cutting. To counter this, a long established method has been to use the thread depth to determine the cutting depth, and to avoid machining in one pass. Instead, the depth is machined in several passes. The cutting tool opens up the thread groove by cutting deeper and deeper, usually by making five to 16 passes, depending on the thread pitch. As each pass is made, more and more material is removed per cut as a larger part of the edge is engaged. For this reason, the depth of cut is reduced successively as the passes are made.
It is best to have radial in-feeds that decrease successively as the passes are performed. The number of in-feed passes must be balanced to provide the edge with sufficient but not excessive cut into the workpiece. Too much cutting force with insufficient cutting depth leads to premature tool wear.
Left and Right-Hand Threads
The difference in direction between left and right-hand threads does not affect the thread profile; it does, however, have some effect on the choice and combination of tools. The method of cutting the thread depends on the workpiece design. Working towards the chuck is the most common method, even though working away from the chuck is in many cases also satisfactory.
The advantage in using right-hand tools for right-hand threads and left-hand tools for left-hand threads, is that the holder is designed to give maximum support to the insert. But under normal cutting conditions this order is not critical. It is vital, however, that inserts always be used with holders of the same hand.
Toolholders and Insert Selection
Compared with conventional turning, the tool and machining parameters of threading are not so flexible. This is mainly because the feed is related to the pitch, the cutting depth is divided into passes and the cutting speed is limited because of the pointed cutting edge.
Indexable inserts are available for external and internal threading. The inserts for internal threading are mirror images of the corresponding external inserts. Both external and internal inserts are available in right and left-hand versions. Since tolerances and cutting geometries differ between external and internal inserts, it is important that they should not be confused.
Coated Threading Inserts
The development within thread turning tools has been considerable during the past thirty years, since the introduction of the first flat inserts with a loose chip former clamped on top of the inserts. Today's modern inserts have done away with most of the possible problems that can arise with conventional threading inserts. This has made threading more closely resemble a turning operation.
The multi-purpose PVD coated inserts allow a wider range of cutting speeds between the area characterized by built-up edge formation at lower speeds - and plastic deformation at higher speeds. Threading involves many short cutting sequences and often relatively low cutting speeds throughout machining. Of major importance in threading is the ability of the cutting tool to keep the built-up edge tendency to an absolute minimum, or prevent it entirely, depending upon the workpiece material. A built-up edge will cause poor surface finish and eventually lead to edge breakdown and tool failure.
Thread Milling
Thread milling has been an established method of manufacturing accurate screw threads for many years. Long screws, such as lead screws on lathes and multiple start threads, are often manufactured by milling.
Milling a screw thread is done with either a single- or multiple-lead milling cutter. The rotating cutter is fed into the work to the required depth. The work is then rotated and fed longitudinally at a rate that will produce the proper lead on the part. Any class of fit or thread form can be manufactured by the thread milling process.
Thread Grinding
Grinding a screw thread generally is done when the hardness of the material makes cutting a thread with a die or single point tool impractical. Grinding threads also results in greater accuracy and in superior surface finishes compared to what can be achieved with other thread-cutting operations. Taps, thread chasers, thread gages, and micrometer spindles all use ground threads.
Ground threads are produced by thread-grinding machines. A thread-grinding machine closely resembles a cylindrical grinder in appearance. It incorporates a precision lead screw to produce the correct pitch or lead on the threaded part. Thread-grinding machines also have a means of dressing or truing the cutting periphery of the grinding wheel so it will produce a precise thread form on the part. Grinding wheels used in producing ground threads are single-or multiple-rib. Single-rib types are used for grinding longer threads and feed longitudinally for the required length of thread. The multiple-rib type of grinding wheel is generally used for forming short threads. This type of wheel is "plunged" into the workpiece to produce the thread.
George Schneider, Jr., is the author of Cutting Tool Applications, a handbook to machine tool materials, principles, and designs. He is the Professor Emeritus of Engineering Technology at Lawrence Technological University, and former Chairman of the Detroit Chapter of the Society of Manufacturing Engineers.
