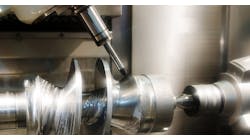
Turning is a metalcutting process used for the generation of cylindrical surfaces. Typically the workpiece is rotated on a spindle and the tool is fed into it radially, axially or both ways simultaneously to give the required surface. The term turning, in the general sense, refers to the generation of any cylindrical surface with a single point tool. More specifically, it is often applied just to the generation of external cylindrical surfaces oriented primarily parallel to the workpiece axis. The generation of surfaces oriented primarily perpendicular to the workpiece axis are called facing. In turning, the direction of the feeding motion is predominantly axial with respect to the machine spindle. In facing a radial feed is dominant. Tapered and contoured surfaces require both modes of tool feed at the same time often referred to as profiling.
The cutting characteristics of most turning applications are similar. For a given surface only one cutting tool is used. This tool must overhang its holder to some extent to enable the holder to clear the rotating workpiece. Once the cut starts, the tool and the workpiece are usually in contact until the surface is completely generated. During this time the cutting speed and cut dimensions will be constant when a cylindrical surface is being turned. In the case of facing operations the cutting speed is proportional to the work diameter, the speed decreasing as the center of the piece is approached. Sometimes a spindle speed changing mechanism is provided to increase the rotating speed of the workpiece as the tool moves to the center of the part.
In general, turning is characterized by steady conditions of metal cutting. Except at the beginning and end of the cut, the forces on the cutting tool and the tool tip temperature are essentially constant. For the special case of facing, the varying cutting speed will affect the tool tip temperature. Higher temperatures will be encountered at the larger diameters on the workpiece. However, since cutting speed has only a small effect on cutting forces, the forces acting on a facing tool may be expected to remain almost constant during the cut.
Related Turning Operations
A variety of other machining operations can be performed on a lathe in addition to turning and facing.
Single point tools are used in most operations performed on a lathe. A short description of six additional lathe operations are given below:
Chamfering: The tool is used to cut an angle on the comer of a cylinder.
Parting: The tool is fed radially into rotating work at a specific location along its length to cut off the end of a part.
Threading: A pointed tool is fed linearly across the outside or inside surface of rotating parts to produce external or internal threads.
Boring: Enlarging a hole made by a previous process. A single-point tool is fed linearly and parallel to the axis of rotation.
Drilling: Producing a hole by feeding the drill into the rotating work along its axis. Drilling can be followed by reaming or boring to improve accuracy and surface finish.
Knurling: Metalforming operation used to produce a regular cross-hatched pattern in work surfaces.
Turning Toolholders
Mechanical toolholders and the ANSI Identification System for turning toolholders and indexable inserts were introduced in Chapter 2.
Toolholder Styles
The ANSI numbering system for turning toolholders has assigned letters to specific geometries in terms of lead angle and end cutting edge angle. The primary lathe machining operations of turning, facing, grooving, threading and cutoff are covered by one of the seven basic tool styles outlined by the ANSI system. The designations for the seven primary tool styles are A, B, C, D, E, F and G.
A Style: Straight shank with 0° side-cutting edge angle, for turning operations.
B Style: Straight shank with 15° side-cutting edge angle, for turning operations.
C Style: Straight shank with 0° end-cutting edge angle, for cutoff and grooving operations.
D Style: Straight shank with 45° side-cutting edge angle, for turning operations.
E Style: Straight shank with 30° side-cutting edge angle, for threading operations.
F Style: Offset shank with 0° end-cutting edge angle, for facing operations.
G Style: Offset shank with 0° side-cutting edge angle; this tool is an 'A' style tool with additional clearance built in for turning operations close to the lathe chuck.
Turning Insert Shapes
Indexable turning inserts are manufactured in a variety of shapes, sizes and thicknesses, with straight holes, with countersunk holes, without holes, with chipbreakers on one side, with chipbreakers on two sides or without chipbreakers. The selection of the appropriate turning toolholder geometry, accompanied by the correct insert shape and chipbreaker geometry, will ultimately have a significant impact on the productivity and tool life of a specific turning operation.
Insert strength is one important factor in selecting the correct geometry for a workpiece material or hardness range. Triangle inserts are the most popular shaped inserts primarily because of their wide application range. A triangular insert can be utilized in any of the seven basic turning holders mentioned earlier. Diamond-shaped inserts are used for profile turning operations while squares are often used on lead angle tools. The general rule for rating an insert's strength based on its shape is: The larger the included angle on the insert corner, the greater the insert strength.
Operating Conditions
Operating conditions control three important metal cutting variables: metal removal rate, tool life and surface finish. Correct operating conditions must be selected to balance these three variables and to achieve the minimum machining cost per piece, the maximum production rate and/or the best surface finish whichever is desirable for a particular operation.
The success of any machining operation is dependent on the set-up of the workpiece and the cutting tool. Set-up becomes especially important when the workpiece is not stiff or rigid and when the tooling or machine tool components must be extended to reach the area to be machined.
Deflection of the workpiece, the cutting tool, and the machine is always present and can never be eliminated totally. This deflection is usually so minimal that it has no influence on an operation, and often goes unnoticed. The deflection only becomes a problem when it results in chatter, vibration, or distortion. It is, therefore, very important to take the necessary time and effort to ensure that the set-up is as rigid as possible for the type of operation to be performed. This is especially important when making heavy or interrupted cuts.
Balancing should be considered when machining odd-shaped workpieces, especially those workpieces that have uneven weight distribution and those which are loaded off-center. An unbalanced situation can be a safety hazard and can cause work inaccuracies, chatter, and damage to the machine tool. While unbalance problems may not be apparent, they may exist at low-speed operations and will become increasingly severe as the speed is increased. Unbalance conditions most often occur when using turntables and lathe face plates.
As material is removed from the workpiece, the balance may change. If a series of roughing cuts causes the workpiece to become unbalanced, the problem will be compounded when the speed is increased to take finishing cuts. As a result, the reasons for problems in achieving the required accuracy and surface finish may not be apparent until the machining operation has progressed to the finishing stage.
Workholding Methods
In lathe work the three most common work holding methods are:
• Held in a chuck.
• Held between centers.
• Held in a collet.
Chucks: The most common method of workholding, the chuck, has either three or four jaws and is mounted on the end of the main spindle. A three-jaw chuck is used for gripping cylindrical workpieces when the operations to be performed are such that the machined surface is concentric with the work surfaces.
With the four-jaw chuck, each jaw can be adjusted independently by rotation of the radially mounted threaded screws. Although accurate mounting of a workpiece can be time consuming, a four jaw chuck is often necessary for non-cylindrical workpieces.
Between centers: For accurate turning operations or in cases where the work surface is not truly cylindrical, the workpiece can be turned between centers. Initially, the workpiece has a conical center hole drilled at each end to provide location for the lathe centers. Before supporting the workpiece between the centers (one in the headstock and one in the tailstock) a clamping device called a dog is secured to the workpiece. The dog is arranged so that the tip is inserted into a slot in the drive plate mounted on the main spindle, ensuring that the workpiece will rotate with the spindle.
Lathe centers support the workpiece between the headstock and the tailstock. The center used in the headstock spindle is called the live center. It rotates with the headstock spindle. The dead center is located in the tailstock spindle. This center usually does not rotate and must be hardened and lubricated to withstand the wear of the revolving work.
The hole in the spindle into which the center fits is usually of a Morse standard taper. It is important that the hole in the spindle be kept free of dirt and also that the taper of the center be clean and free of chips or burrs. If the taper of the live center has particles of dirt or a burr on it, it will not run true. The centers play a very important part in lathe operation. Since they give support to the workpiece, they must be property ground and in perfect alignment with each other. The workpiece must have perfectly drilled and countersunk holes to receive the centers. The center must have a 60-degree point.
Collets: Collets are used when smooth bar stock, or workpieces that have been machined to a given diameter, must be held more accurately than normally can be achieved in a regular three or four jaw chuck. Collets are relatively thin tubular steel bushings that are split into three longitudinal segments over about two thirds of their length. The smooth internal surface of the split end is shaped to fit the piece of stock that is to be held. The external surface at the split end is a taper that fits within an internal taper of a collet sleeve placed in the spindle hole. When the collet is pulled inward into the spindle, by means of the draw bar that engages threads on the inner end of the collet, the action of the two mating tapers squeezes the collet segments together, causing them to grip the workpiece.
Toolholding Devices
The simplest form of toolholder or post is suitable for holding one single-point tool. Immediately below the tool is a curved block resting on a concave spherical surface. This method of support provides an easy way of inclining the tool so that its comer is at the correct height for the machining operation. In the figure below, the tool post is shown mounted on a compound rest. The rest is a small slideway that can be clamped in any angular position in the horizontal plane and is mounted on the cross slide of the lathe. The compound rest allows the tool to be hand fed at an oblique angle to the lathe bed and is required in operations like screw-- threading and the machining of short tapers or chamfers.
Another common form of tool post, the square turret, is shown below. It also is mounted on the compound rest. As its name suggests, this four-way tool post can accommodate as many as four cutting tools. Any cutting tool can be quickly brought into position by unlocking the tool post with the lever provided, rotating the tool post, and then reclamping with the lever.
All standard toolholders are designed to cut with the cutting point located on the centerline of the machine and workpiece. If the cutting point is not on the centerline, the clearance angle between the toolholders and the workpiece will be reduced. The lack of clearance will lead to poor tool life and poor surface finish. It will also force the workpiece away from the tool when working with small diameters.
On the other hand, if the cutting edge is positioned below the centerline, the rake angle becomes more negative. Very high cutting forces will be generated and the chip will be directed into a tight curl. Insert fracture can very easily occur and a small diameter workpiece can even climb over the top of the tool and be torn from the machine.
Occasionally, however, moving the cutting point off centerline can solve a problem. An example is in situations when machining flimsy parts or when deep grooving chatter is a constant threat, even when a positive rake tool is used. Moving the tool slightly above centerline (2 percent to 4 percent of the workpiece diameter) will change the rake angle slightly; and this, in turn, will reduce cutting forces and make chatter less of a danger.
Interrupted cuts resent special problems, particularly when machining large diameter workpieces. It is best to position the cutting point slightly below the centerline to present the insert in a stronger cutting position. A lead angle should also be used whenever possible. Moving the cutting point slightly below the centerline and using a lead angle, allows the workpiece to contact the tool on a stronger part of the insert, behind the nose.
Cutting Conditions
After deciding on the machine tool and cutting tool, the following main cutting conditions have to be considered:
Cutting speed: Cutting speed refers to the relative surface speed between tool and work, expressed in surface feet per minute. Either the work, the tool, or both, can move during cutting. Because the machine tool is built to operate in revolutions per minute, some means must then be available for converting surface speeds into revolutions per minute (RPM).
All tool materials are meant to run at a certain SFM when machining various work materials. The SFPM range recommendations for tool and work materials are given in many reference publications.
Depth of cut: The depth of cut relates to the depth the tool cutting edge engages the work. The depth of cut determines one linear dimension of the area of cut. For example: to reduce the outside diameter (OD) of a workpiece by 0.500 in., the depth of cut would be 0.250 in..
Feedrate: The feedrate for lathe turning is the axial advance of the tool along the work for each revolution of the work expressed as inches per revolution (IPR). The feed is also expressed as a distance traveled in a single minute or IPM (inches per minute).
Feed, speed, and depth of cut have a direct effect on productivity, tool life, and machine requirements. Therefore, these elements must be carefully chosen for each operation. Whether the objective is rough cutting or finishing will have a great influence on the cutting conditions selected.
Hard Turning
As the hardness of the workpiece increases, its machinability decreases accordingly. And tool wear and fracture, as well as surface finish and integrity, can become a significant problem. There are several other mechanical processes and non-mechanical methods of removing material economically from hard or hardened metals. However, it is still possible to apply traditional cutting processes to hard metals and alloys by selecting an appropriate tool material and machine tools with high stiffness and high-speed spindles.
One common example is finish machining of heat-treated steel machine and automotive components using polycrystalline cubic boron nitride (PCBN) cutting tools. This process produces machined parts with good dimensional accuracy, surface finish and surface integrity. It can compete successfully with grinding the same components, from both technical and economic aspects. According to some calculations grinding is more than ten times more costly than hard turning.
Advanced cutting tool materials, such as polycrystalline cubic boron nitride (PCBN) and ceramics (discussed in Chapter 1, Cutting Tool Materials), have made the turning of hardened steel a cost effective alternative to grinding. Many machine shops have retired their cylindrical grinders in favor of less expensive and more versatile CNC lathes.
Compared to grinding, hard turning:
• Permits faster metal removal rates, which means shorter cycle times;
• Eliminates the need for coolant (dry vs. wet machining will be discussed later); and
• Shortens set up time and permits multiple operations to be performed in one chucking.
Today's sophisticated CNC ladies offer accuracy and surface finishes comparable to what grinders provide.
Hard turning requires much less energy than grinding, thermal and other damage to the workpiece is less likely to occur, cutting fluids may not be necessary and the machine tools are less expensive. In addition, finishing the part while still chucked in the lathe eliminates the need for material handling and setting the part in the grinder. However, work holding devices for large and slender workpieces for hard turning can present problems, since the cutting forces are higher than in grinding.
Furthermore, tool wear and its control can be a significant problem as compared to the automatic dressing of grinding wheels. It is thus evident that the competitive position of hard turning versus grinding must be elevated individually for each application and in terms of product surface integrity, quality, and overall economics.
Dry vs. Wet Machining
Just two decades ago, cutting fluids accounted for less than 3 percent of the cost of most machining processes. Fluids were so cheap that few machine shops gave them much thought. Times have changed.
Today, cutting fluids account for up to 15 percent of a shop's production costs, and machine shop owners constantly worry about fluids.
Cutting fluids, especially those containing oil, have become a huge liability. Not only does the Environmental Protection Agency (EPA) regulate the disposal of such mixtures, but many states and localities also have classified them as hazardous wastes, and impose even stricter controls if they contain oil and certain alloys.
Because many high-speed machining operations and fluid nozzles create airborne mists, governmental bodies also limit the amount of cutting fluid mist allowed into the air. The EPA has proposed even stricter standards for controlling such airborne particulate. and the Occupational Safety and Health Administration (OSHA) is considering and advisory committee's recommendation to lower the permissible exposure limit to fluid mist.
The cost of maintenance, record keeping and compliance with current and proposed regulations is rapidly raising the price of cutting fluids. Consequently, many machine shops are considering eliminating the costs and headaches assodated with cutting fluids altogether by cutting dry.
The decision to cut wet or dry must be made on a case-by-case basis. A lubricious fluid often will prove beneficial in low-speed jobs, hard-to-machine materials, difficult applications, and when surface finish requirements are demanding. A fluid with high cooling capacity can enhance performance in high-speed jobs, easy-to-machine materials, simple operations and jobs prone to edge-buildup problems or having tight dimensional tolerances.
Many times, though, the extra performance capabilities that a cutting fluid offers is not worth the extra expense incurred, and in a growing number of applications, cutting fluids are simply unnecessary or downright detrimental. Modern cutting tools can run hotter than their predecessors and sometimes compressed air can be used to carry hot chips away from the cutting zone.
George Schneider, Jr., is the author of Cutting Tool Applications, a handbook to machine tool materials, principles, and designs. He is the Professor Emeritus of Engineering Technology at Lawrence Technological University, and former Chairman of the Detroit Chapter of the Society of Manufacturing Engineers.
