Precision machining is an elusive concept. There are no set tolerance ranges that clearly define a workpiece as high precision. And jobs considered high precision can range anywhere from having to consistently hold a 5-micron tolerance for a large batch of parts, to maintaining a 2-micron, true positioning tolerance so two parts accurately match up with each other, to milling a piece of 50-Rc hardened steel with a 50-micron end mill on a machine that has a positioning accuracy of 0.3 microns.
In high-precision work, part sizes and job volumes determine how challenging a particular tolerance is, said Peter Pfister, operations manager at Finecast Ltd. (www.finecast.ca), a precision machining shop in Montreal, Canada.
Pfister pointed out that holding a 0.001-in. tolerance along the length of a long, large aluminum part can be just as challenging as holding a 0.0002-in. tolerance on a tiny dental part. He also noted that it is a lot harder to hold tight tolerances when running high production.
Finecast specializes in highly precise and complex machining of small to medium-size prototype and medium-batch-production parts for the medical, aerospace, electronics and semiconductor industries. The shop is confident and comfortable doing 5-axis machining on titanium parts using 0.010-in.- diameter cutters, drilling holes in stainless steel with 0.006-in.-diameter drills, or maintaining 1.5 to 2-micron diameter tolerances on production-run parts.
For Finecast, high-precision involves meeting tight tolerances for part feature positioning, and meeting similar tolerances for hole diameters, part perpendicularity, cylindricity, circularity, parallelism, flatness and on 3D surface profiles. Often, the shop works on parts that have 300 features, each with a different tolerance. For example, one part had a 3D surface profile tolerance of 0.0002 in. and a flatness requirement of 0.0001 in.
According to Pfister, part cycle times for his high-precision jobs are not as critical as they are for lower-tolerance high-production jobs.
“When parts have tight tolerances, the overall process changes, and cycle times typically increase. While customers want their parts as soon as possible, they do realize that cycle times for high-precision complex parts can run longer. We make parts that conform to specifications, and 90 percent of the parts we ship leave the shop with some form of inspection report,” he said.
At Owens Industries Inc. (www.owensind.com) in Oak Creek, Wis., high-precision machining is a team effort.
The shop doesn’t have programmers, so part programs don’t pass from a programmer to setup personnel to machine operators. Instead, the shop works in teams that consist of project leaders and two or three other team members who handle every aspect of its high-precision jobs from blue print to shipment. Owens Industries specializes in high-tech jobs that require holding true positioning tolerances as tight as 2 microns.
“You can’t run a high-precision shop with our types of jobs and tolerances like you would run a typical production shop. Those types of shops are familiar with running certain kinds of parts in particular ways. But, when we have to make five parts with tolerances at the micron level for a heart valve, we can’t just whip up the program and have the operator run the job,” Mark Plesnik, vice president of Owens Industries, said.
He said the shop’s jobs require hands-on attention at all times.
Once a team gets a project, that team owns it from start to finish. And if a part comes back, the team is responsible.
The shop’s five teams each handle as few as one or as many as five jobs per month.
While each team works with a different process – one team for EDM, one for grinding, two of turning and milling and one for part deburring – there is a lot of project transfer between them. The team leader for one team will work with other team leaders as part process requirements dictate.
Surprisingly, at Owens Industries, the deburring department/ team is often the most critical because some parts are so small they have to be deburred while viewing them under 50 X magnification. One such part was a 0.010-in.-diameter tube with wall thicknesses of 0.003 in. This part had several machined features that created burrs needing to be removed.
“When we get a part that’s not much bigger than the point of a pen, and it has 65 to 70 part features on it, deburring is an extremely delicate and critical operation,” Plesnik said. For another job, the deburring department had to use a Q-tip cotton swab with polishing compound to generate an exact 8-micro finish on the parts.
Unlike typical job shops, Owens Industries doesn’t arrange its machines into cells. Instead, it groups its machines according to type.
Besides machining cells, Plesnik said there are other practices that are common in production shops, such as automation, that just don’t work for his shop.
“There’s really no place for it (automation) in our shop. We just don’t deal with job volumes big enough to justify its use,” he said.
Although, Plesnik said the one prerequisite every highprecision shop needs is a willingness to pay, in both monetary compensation and in-house training, for highly skilled and talented people. Without skilled people, Plesnik said shops such as his couldn’t succeed. That is the reason that Owens Industries home-grows most of its personnel.
Requirements for high precision
As both a high-precision shop and builder of high-precision machine tools, Kern Micro- und Feinwerktechnik GmbH & Co. (www.kern-mcirotechnic.com) near Munich, Germany, and its U.S. subsidiary Kern Precision Inc. in Webster, Mass., know what it takes to be a successful highprecision machining shop. The requirements encompass machine tools, measuring capabilities, tooling, shop environments, and workholding.
To categorize the work it does in its shop and to differentiate its machine tool products’ accuracies, Kern defines high precision as three levels of part accuracy.
The first is micro-precision as defined by workpiece accuracies below 10 microns.
The second is ultra-precision, which is workpiece accuracies lower than 3 microns.
And, the third is nano-precision, defined by workpiece accuracies below 1 micron.
Kern builds machining centers for each one of these categories.
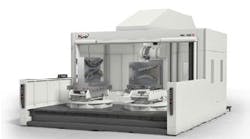
Kern’s Pyramid Nano is the company’s most accurate and largest machine. Its travels measure 20 in. by 20 in., and within that work envelope, the machine positions to an accuracy of 0.3 microns. It machines test workpieces to tolerances of +/- 1 micron.
How does Kern know this? It uses a special system from Carl Zeiss Inc. (www.zeiss.com) that has measuring accuracies of 0.25 microns. In fact, Kern is the first commercial user of this system.
Agreeing on the importance of measuring capabilities for both workpieces and machine tools, Pfister of Finecast said that shops can’t make precision parts if they can’t measure them. A shop’s inspection capability must match the tolerances it is trying to achieve.
“Just because a machine tool’s specification sheet lists a +/- 0.0002-in. positioning accuracy, doesn’t mean a hole pattern drilled on that machine will be within +/-0.0002 in. Believing so is the first indication that a shop doesn’t know what precision is, and unfortunately, a lot of shops rely on such machine specifications,” Pfister said.“
To illustrate his point, Pfister said his shop had a machine that had a +/-0.0002-in. positioning accuracy listed in its specifications. However, after the machine ran for a while at high feedrates, that accuracy specification grew to an actual 0.004 in. because of heat from ballscrew expansion. That is the reason that Finecast uses laser calibration to validate the axis accuracy of all its in-house machine tools.
Since Kern lists its machine accuracies as those achieved on actual test workpieces, those specifications take into account positioning accuracy and tolerances derived from the machine’s spindle, toolholders, and cutting tools, Burkhard Rother, chairman of Kern, said.
Kern equips its machine tools with special, vector-controlled spindles that have runouts of less than 1 micron. Vector control allows the spindles to reach full torque in lower rpm ranges, and it makes it possible for the machine’s CNC to know a spindle’s rotational position at any time.
Kern machines, through vector control, can stop their spindles at the same exact rotational position for each toolchange, and Rother said that loading tools in the same spindle rotational position each time they are used can increase machine accuracy by as much as 1 or 2 microns. Rother further recommends that shops use high-precision collets, shrink-fit holders or balanceable toolholders to hold tools.
Kern also uses vector control to load touch probes accurately into machine spindles.
During part-probing operations, Kern touches one side of a part, rotates the machine spindle 180 degrees, and touches the opposite part side to ensure that the same side of the probe is used to touch off on the two opposite sides of the part.
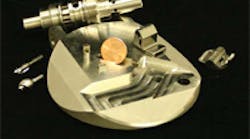
“These are things that shops have to do for high-precision work. We do them every day in our machine shop in Germany,” Rother said. He should know, the shop once had to mill 50-Rc steel parts using a 50-micron-diameter cutter and drilled 30-micron-diameter holes into a human hair (see “Kern’s move to machine tools” sidebar).
At Kern’s Germany shop, high-precision machines operate in a vibration-free climate-controlled environment. The highprecision machines are separated from the shop’s other machines and are kept away from other external sources of vibration. In addition, Kern keeps the machines in a working area that has a controlled temperature that fluctuates no more than +/-1-degree C.
Rother said that the machines would perform well in greater temperature fluctuations, but for repeatable high accuracy, the temperature should be held constant. Kern equips its machines with internal thermal-stabilization systems to provide more temperature control.
Another must for high-precision machines is a direct-measuring system, such as glass scales, to calculate positioning. Glass scales replace using ballscrew pitch and rotary encoders for calculating positioning. All axes on all Kern machines feature Heidenhain (www.heidenhain.com) glass scales.
When it comes to workholding for high-precision machining, Finecast, Owens Industries, and Kern all recommend the use of reference workholding systems, such as those offered by System 3R (www.system3r.com).
For Owens Industries, these modular systems streamline part processing by holding parts in setups that can transfer quickly from one type of machine to another. And, because reference workholding systems also work well for Finecast, that shop plans to eliminate the T-slots on its machines altogether.
