Switching cleaning fluids inside a vapor degreaser is a decision that many industrial businesses make to enhance efficiency, safety, and environmental compliance. However, this process requires careful attention to cleaning, neutralization, and passivation of the vapor degreaser in order to avoid potential issues down the line. In this article, we will examine one manufacturer’s experience converting from nPB (n-Propyl Bromide) to a more modern, more environmentally sustainable solvent, underscoring the significance of meticulous vapor-degreaser cleaning during the transition.
The Switch. The manufacturer decided to replace nPB with a low boiling, more environmentally sustainable cleaning fluid. While the vapor degreaser had no external piping where solvents could linger, and the water separator was a small reservoir on the side, it was still essential to conduct a thorough cleaning process during the conversion. However, the manufacturer did a poor job.
The Consequences: Unfortunately, traces of nPB remained on the coils or in the recesses of the machine. As nPB had a higher boiling point than the replacement fluid, it remained behind as the lower-boiling solvent evaporated. Over time, as the stabilizer in the nPB dissipated, the residual nPB turned acidic, resulting in machine corrosion and compromised the degreaser performance.
The Solution. It is recommended to consult with the cleaning fluid supplier for technical assistance prior to transitioning from one cleaning fluid to another. They can provide helpful recommendations for the thorough neutralization, cleaning, and passivation process for the vapor degreaser. While neutralizing chemistry is cost-effective, the process itself is labor-intensive, messy, and requires proper disposal of the old solvents. Consequently, production may need to be temporarily paused, taking several days to complete.
To ensure safe and effective cleaning, neutralizing, and re-passivation of solvent vapor degreasers, here are the recommended steps to follow:
Cleaning.
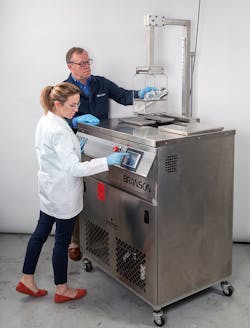
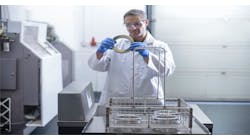
Prioritize safety by adhering to proper safety protocols, including the use of personal protective equipment. Additionally, it is essential to have two people present during the process and to ensure adequate ventilation.
Prior to entering or leaning into the vapor degreaser, evacuate all solvent vapors as breathing in high vapor concentrations can be extremely dangerous. Take note that solvent vapors are heavier than air and can concentrate in low-lying spaces such as degreasers and pits.
During the cleaning process, use soap or a mild, non-scratching scouring powder to clean the degreaser walls and surfaces that encounter solvent. Pay particular attention to removing all rust, especially from the condensate trough and water separator. Avoid using a steel brush or sponge that may scratch or leave embedded particles in the stainless-steel surface.
After cleaning, thoroughly rinse all surfaces with clean water and drain all water out of the degreaser.
Neutralizing.
Begin the neutralization process by filling the degreaser with warm water, making sure it covers the primary condensing coils. If the degreaser cannot support the weight and pressure of the water, fill it above the level of the condensate rinse sump. Ensure all spaces contacted by the solvent (liquid or vapor), including spray reservoirs, water separators, filters, and plumbing, are filled with water.
Add 1.5 ounces of sodium bicarbonate (or soda ash) per gallon of water and mix it thoroughly into the solution. Avoid eye contact with the powder or solution, and never use caustic soda for this purpose.
Turn on the heaters and raise the water temperature to approximately 120 ℉ (50℃).
Activate the pumps and spray lance to circulate the solution throughout the entire system, ensuring that the metal is neutralized. If the degreaser cannot be filled above the cooling coils, spray or flush the alkaline water over the condensate cooling coils and the degreaser walls above the liquid level.
Regularly measure the pH of the water with pH paper to ensure it remains alkaline. If the pH is not alkaline, add more sodium bicarbonate or soda ash to maintain the alkaline state. While continuing to heat, circulate and monitor the pH of the solution for several hours.
Drain all the water out of the degreaser, water separator, and spray wand and refill with fresh, clean water, covering the primary condensing coils. Run the pumps and circulate rinse water for 30 minutes, repeating this process until the water remains neutral.
Drain all the rinse water from the degreaser, ensuring that the sumps, water separator, spray wand, and all plumbing are completely drained.
Re-passivation.
Prepare a 7% (by volume) citric acid solution by slowly stirring the citric acid into the water. Never add water to the citric acid as it may cause splattering and unsafe results.
Fill the degreaser, to a level above the primary condenser coils, with the 7% citric acid solution. Ensure all surfaces that encounter the solvent or solvent vapor are covered or flushed by the solution.
Turn on the heaters and heat the solution to a temperature between 120°F and 160°F.
Circulate the solution throughout all piping, filter housing, spray reservoirs, and water separator. After approximately two hours of circulation, turn off the heaters and circulating pumps.
Allow the system to cool and drain the citric acid solution from the degreaser, as well as from all piping, filter housing, spray reservoirs, and water separator.
Refill the degreaser and all associated components with fresh rinse water. Turn on the heaters and circulate the rinse water for approximately 30 minutes.
Drain all the rinse water from the degreaser and its components and repeat the rinsing step once more to ensure thorough cleaning.
Drain out all the rinse water and thoroughly dry the entire degreaser. It is recommended to circulate dry air through the system overnight.
Reset all thermostats (liquid and vapor), add fresh solvent, and then verify that the degreaser functions properly.
Lastly, dispose of all chemicals and solutions in a responsible manner that meets all local, state, and federal guidelines.
Be sure to test
During the conversion, it is essential to pull a sample after approximately three weeks and have it evaluated for any remaining nPB. If traces of nPB are detected, prompt disposal of the solvent and refilling with the chosen new fluid are crucial. Failure to do so could lead to the degreaser's gradual deterioration within approximately 12 months.
The experience of this manufacturer highlights the critical importance of thoroughly cleaning, neutralizing, and passivating a degreaser when transitioning from one solvent to another. Neglecting this essential step can result in costly consequences, including machine corrosion, compromised performance, and potential safety hazards. By adhering to recommended cleaning and conversion procedures, industrial businesses can ensure a smooth transition and preserve the longevity and effectiveness of their vapor degreaser equipment.
Remember, investing the time, effort, and resources into proper cleaning during conversion is always a wise decision overall. However, it is crucial to note that the information provided in this article is based on one manufacturer’s equipment and may vary depending on the specific degreaser models and solvents used. It is always recommended to consult the manufacturer's guidelines and seek professional advice from the cleaning fluid supplier when conducting a cleaning fluid transition to ensure optimal results and compliance with safety and environmental standards.
Elizabeth Norwood is a senior chemist at MicroCare LLC, a provider of precision cleaning solutions, with more than 25 years industry experience.

