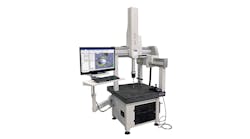
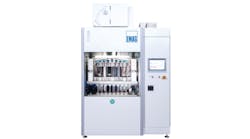
LK METROLOGY’s new Alto 6.5.5 CNC coordinate measuring machine is a new option for manufacturers wishing to graduate from manual metrology. The programmable machine has guideways made from aluminum, lowering the capital cost compared to systems with ceramic components, and other design features contributing to a compact measuring machine, with high accuracy and rapid throughput normally.
The CMM has a half-gantry design, which improves accuracy by shortening on one side the leg supporting the bridge. Additionally, the fixed aperture created beneath the short leg facilitates easier loading and unloading of components from that side of the machine.
Micro-machining of the aluminum elements by fly-cutting them in an unclamped condition eliminates distortion that might occur on releasing conventional workholding fixtures after milling. All of the aluminum parts are hard anodized before assembly of the CMM, creating a 50-µm thick layer that imparts extreme durability and prevents corrosion.
Designed for touch-trigger probing only, the Alto 6.5.5 CMM captures measurements quickly, as it is able to deploy a motorized, ph20 five-axis probe head from Renishaw to increase inspection speed. Continuous angular rotation and infinite positioning avoids having to move the machine's X, Y, and Z axes at high speed, minimizing dynamic errors. For some measurements in a cycle, it is not necessary to move the linear axes at all. The results are better accuracy and repeatability.
Furthermore, five-axis motion allows larger parts to be measured on the CMM by minimizing the space required around the part for head rotation. Unsurprisingly the ph20 is the most expensive probe head on offer.
The compact Alto CMM is designed for linear travels of 600 x 500 x 500 mm. All electronics including the pc system are integrated within the base for a small footprint, and guideways do not extend beyond the table, as in other designs.
The design integrates features of LK's other CMMs, including a 100 mm thick granite table, low-maintenance pre-loaded air bearings, and zero-hysteresis friction drives in all axes, for smooth motion and exact positioning. Standard equipment are a sub-micron optical measuring scale system with dynamic signal processing for stability, pneumatic counterbalance in the z-axis and multi-sensor thermal compensation. The machine minimizes inspection cycle times due to rapid acceleration at 1,500 mm/s2 up to axis speeds of 500 mm/s.
The machine is able to measure a length l to an accuracy of 2.5 + 3.0l/1000 μm, to a high degree of repeatability in an environment temperature-controlled to 16°-26°C. An optional shop-floor pack with a pneumatic anti-vibration system and extended operational temperature range of between 15°-35°C is available if the CMM is installed in production environments.
The machine is supplied with TouchDMIS, an all-touch CMM software with a “minimalist” user interface that requires just a few hours' training. It offers native import of step and IGES files and full CAD capability. The ergonomically developed, touchscreen graphical user interface provides maximum productivity for novice or expert CMM users, incorporating floating toolbars to maximize the area available for graphics, with all principal software actions accessed via eight large buttons. TouchDMIS has no drop-down menus or stacked toolbars and all functionality is simply accessed with a single touch. A choice of reporting options is provided.
Learn more at www.lkmetrology.com
