For precision grinding, ANCA recently launched LaserUltra, an updated version of its in-process measurement technology LaserPlus, which gives customers the confidence to execute unmanned machining.
LaserUltra is an automatic OD, profile measurement and compensating system for ANCA’s TX, MX, and FX machines. It measures and compensates tools to maintain tight tolerances (0.002 mm) in unmanned production grinding. The in-process measurement is available in both digital and analog formats for fast and accurate measurements to promote productivity and performance improvements.
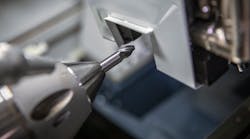
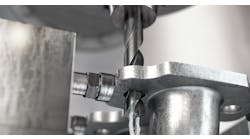
It is permanently mounted inside the machine and will not interfere with typical grinding processes and accessories. Using the laser, the operator can perform accurate in-process measurement and compensation without removing tools from the machine.
LaserUltra offers a 70% reduction in measurement time compared to LaserPlus thanks to the new Analog measurement – a continuous edge scan instead of number of digital points along the cutting edge. This process also eliminates variations caused by machines standing idle; errors due to manual wheel corrections; and the necessity of skilled operators. Instead, LaserUltra increases accuracy, productivity, and scrap reduction.
ANCA’s LaserUltra allows operators to measure tool geometries to tolerances of 0.002 mm without removing the tool from the grinder, saving time in the manufacturing process, and ensuring maximum accuracy in measurement is maintained over large batch grinding.
LaserUltra offers customers:
• A cycle time that is approximately 70% faster than LaserPlus in normal tool measurements, which relates directly to increased productivity.
• Greater accuracy due to the continuous edge scan rather than a number of points.
• Several new tool types, like barrel-shape cutters and lens shapes, are included with LaserUltra measurement cycles.
• New operations like run-out compensation and enhanced functions.
• Larger working envelop means larger diameters and length of tools can be measured.
• The measurement reports have been modified to suit customers’ requirements.
• Eliminates errors caused by manual compensation process.
“The intersection of five-axis milling machines, advanced CAD/CAM software, and advanced profile geometry cutting tools is revolutionizing the die-and-mold and aerospace machining industries,” according to ANCA co-founder Pat Boland. “ANCA’s LaserUltra tool-measurement system together with RN34 software gives tool manufacturers all they need to manufacture complex profile endmills productively to outstanding accuracy.”
Learn more at machines.anca.com
