Robert Howard had spent more than a decade managing inspection programs for manufacturing businesses, gaining expertise in metrology, quality control, and measurement technologies. He understood well the degree of core measuring capability that is required to offer competitive offering dimensional measurement service on a contract basis.
“The key to success in contract measuring is to be able to program fast and have equipment that can run parts with a high degree of accuracy and repeatability,” according to Howard, who banked on his 15 years of experience when he formed Carolina Metrology in Duncan, SC, to offer all those capabilities to manufacturers.
“When you can provide high-quality dimensional service at a competitive value, understand the inherent degrees of accuracy of the different types of equipment, and supply the scheduling and timing required to meet the customer’s requirements, you have mastered the fundamentals of CMM measuring,” he added.
“When I decided to start Carolina Metrology,” Howard recalled, “I looked for a CMM equipment supplier that could quickly deliver a complete solution and provide the service required to get my new company up and running quickly.” For several reasons, he settled on Coord3 as the equipment supplier, reasoning it would its technologies and resources would address all the requirements.
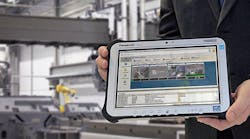
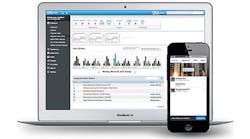
“We had access to a complete range of high-quality new Coord3 measuring centers and direct access to TouchDMIS software with its intuitive touch interface, offering innovative and time saving features,” he continued. “The traditional CMM software programs that we had prior experience with provided access to functionalities through a complex system of toolbars, dropdown menus and tedious window selections. TouchDMIS gave us a revolutionary user interface, using smart technology with full CAD capability, minimizing learning time to just a few hours, and with immediate productivity benefits.”
Elliott Mills, CMM product and sales director for Perceptron, the developer of Coord3 products and technologies, explained that Carolina Metrology presented a unique opportunity for the company.
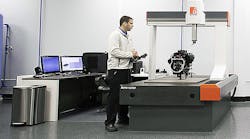
“Because Robert Howard is so experienced with metrology systems, CMMs, and the nuances of the available software, it was very easy to sit down and evaluate the level of business that he was going to pursue with respect to his equipment and software needs,” Mills reported. “Ultimately we provided two different types of Coord3 CMMs: A Coord3 Hera 10.7.7 model with a Renishaw PH20 probe; and a Coord3 Hera 15.10. 9 with a Renishaw PH10MQ for large-part inspection and tactile and laser scanning.”
The Coord3 Hera CMMs are bridge DCC CMMs for small- and medium-scale measuring volumes that offer advanced performance measuring platforms with integral dovetail X axis machined directly into the granite plate, thus providing exceptionally stable metrology performance.
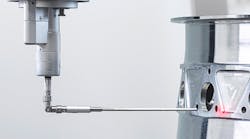
Also, Hera CMMs can be equipped with Renishaw touch or scanning probes and are suitable for all applicable manufacturing measuring applications. The Hera Model 10.7.7 has a measuring range of 1,000x700x700 mm. The 10.15.9 Model has a measuring range of 1,500x1,000x900 mm.
“It’s really the CMM software that gives a measuring service like ours the ability to react quickly,” Robert Howard indicated, “but interestingly, we had been using three other different software versions. The Hera machines allowed us to continue to use those other softwares until we familiarized ourselves with the new TouchDMIS, which was a real benefit to us.
“As you can imagine,” he continued, “after spending over fifteen years in the area of metrology, I have worked with just about every type of software, and they are always being enhanced and improved. We now prefer our TouchDMIS, because it takes the guess-work out of CMM programming by seamlessly integrating CAD data with the CMM programming and measurement process, providing us with a high level of power, precision, and productivity at the single click of the mouse.”
Howard also credited Coord3 for working as a technology partner while he established the new company. “We were particularly impressed with their overall knowledge, attention to detail and understanding of our customers’ needs and expectations,” he said.
Today, Carolina Metrology’s core services includes measuring production and prototype parts for automotive OEMs, aerospace companies, appliance manufacturers, and power generation manufacturers. “We also specialize in a wide variety of plastic and composite parts,” according to Howard. “We perform certification services for gages and fixtures as well as provide CMM programming and training. Coord3 enabled us to get Carolina Metrology up and running quickly, with the right CMM machines and software, at a very reasonable start-up cost.”
