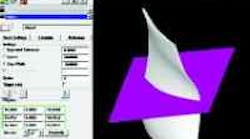
Zeiss' new Calypso software accurately measures a turbine-blade profile.
Shops use many different parameters and analyzing methods to evaluate turbine-blade quality. But the job could become easier and more accurate thanks to a new inspection program that uses data from coordinate-measuring-machine (CMM) software. Carl Zeiss Industrial Measuring Technology (IMT), Maple Grove, Minn., has introduced Blade, which works with the curve-measuring options of the company's Calypso and UMESS CMM software. Data from Calypso and KUM Curve (an option of UMESS) transfers directly to Blade, which uses it to determine different part qualities. These include form deviations of the blade profile, maximum blade thickness and radius at the leading and trailing edges, thickness at various points, and the twist angle of the blade. For this process, best-fit algorithms compensate for the frequent and disproportionately high length errors of turbine blades.
The software defines and stores the scope and type of evaluation and the nominal data of each blade type. Shops can also retrieve nominal data from the CMM software. Dimensions and other data ready for evaluation and best-fit options appear in separate tables. In addition, a record/preview window lets shops investigate the impact of changes.
