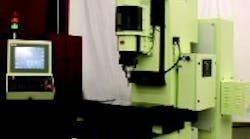
This prototype, high precision jig grinder (above) from Moore Tool Co. will be introduced soon as a commercial machine similar to this artist's rendering.
Moore Tool Company of Bridgeport, Conn., (www.mooretool.com) says it has developed a prototype jig grinder that in beta tests has consistently held roundness tolerances within 10 micro in. (0.000010 in.) and linear accuracy to tolerances within 50 micro in. (0.000050 in.). Moore Tool plans to introduce early in 2006 a commercial jig grinder using the technology it developed for the prototype.
In the tests, Moore Tool said its prototype held tolerances that are more than three times better than tolerances that can be reached through competitive technology.
Moore Tool said workpieces in the beta test program included a variety of carbide, steel and stainless steel bushings, and items used to make precision parts typically found in molds, miniature electronic, automotive electronic and medical components. The company said the machine was checked for synchronous error motion of the main spindle and for positional accuracy of the linear slides.
The company said the prototype grinder held roundness within 9.9 micro in. on a carbide bushing with a 0.570-in. straight hole, using a hydrostatic main spindle. Grinding was done with an 8.0-mm, 600-grit resin bond diamond wheel running at 40,000 rpm. Finishing was done in four passes at a 50 mm/min feed rate in a chop cycle mode using a waterbased cutting fluid. Roundness was measured on both an air bearing roundness checker with a 50-nanometer radial error and a Moore M-14 roundness-measuring machine with a 150-nanometer roundness error.
On a larger bushing made of D-2 die steel hardened to Rc 62-63 with a 1.50-in. center hole, Moore Tool said its prototype grinder held tolerances to 7.3 micro in. on roundness. Radial and axial error motion of the orbiting spindle was checked at 50 rpm to 300 rpm using a Lion Precision gage. At the maximum spindle speed — 300 rpm — the radial error motion (synchronous error) measured 7.5 micro in. (0.0000075 in.). At 50 rpm, the radial error motion was 4 micro in. (0.000004 in.).
"The move to this new level of ultra-precision is in direct response to requests from mold makers and miniatureoptoelectronic manufacturers to be able to produce more accurate contoured holes to better finishes," says Kevin Uhlig, Moore vice president for sales and marketing.
Moore Tool said it has three orders for its ultra-precise jig grinder, on the basis of its tests, from Pacific Rim automotive and electronics manufacturers.
The company said the commercial model — the Moore H-500 CPWZ — for its jig grinder will handle wet and dry grinding of holes and contours and will work in four axes simultaneously. The grinder will be equipped with a hydrostatic main spindle and a GE Fanuc 180i-MB CNC control with a PC front end.
