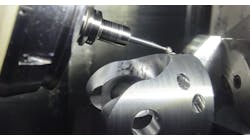
"We don't believe it!" – that's how experienced machinists reacted to their first encounter with a machine tool that had produced nine bores per part with only 0.000020 in. (0.5 µm) variation, all day long, with essentially no operator attention. That's 2.21 Cpk process capability. It's transformative technology in a shop like Waltz Brothers Inc., a precision grinding and machining operation in Wheeling, Ill., where these parts – flight-critical hydraulic pumps – are produced by the hundreds every year.
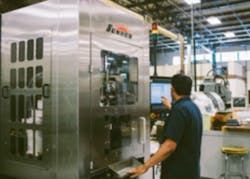
So, it did not surprise president Larry Waltz that his machine operator complained no one at the shop believed the results, achieved by a new Sunnen SV-1015 honing system on its first run of production parts.
Waltz knows it's hard to hit this tolerance window honing one bore per part, to say nothing of nine bores, as the shop had been doing with a standard machine. With nine opportunities to make a micron-sized mistake on an expensive workpiece, it takes great skill and many time-consuming machine/measure iterations to make these parts on a standard machine.
The new hone not only produces perfect bores, it also records its final air gaging measurements to track with each serialized part. "When I showed this new machine to a customer for whom we'd been making these parts, they were so impressed they wanted us to commit to a blanket order for all their parts for the next five years," Waltz said. "In that instant, we validated our painstaking decision to adopt this technology."
One critical detail about the Sunnen machine is a patented, new ‘smart tooling’ technology that servocontrols the force on a honing machine's tool feed system. This and other machine automation capabilities, such as robotic part indexing and in-process air gaging, have created a new reality at Waltz, a company that looks at machining through the eyes of a precision grinding shop.
"We're a second-generation grinding business started by my father and uncles in 1939," explained Waltz. "Our focus is close-tolerance precision parts requiring many operations that typically conclude with grinding, honing, or lapping, so we added chip cutting to better control the processes upstream from grinding.
“Most machine shops don't process blanks in a way that facilitates good grinding, honing or lapping results,” he continued. “For example, if a part is machined between centers, most shops will not be too concerned about variation in the centers, which will affect how consistently the part locates in a grinding fixture. We want to control these factors -- straightness, hardness, stock allowance, etc. If grinding is only a side business to a shop's chip cutting, they won't look at things the way we do."
Aerospace Piston Pumps
One specialty at this 60-person operation is manufacturing parts that go into aerospace hydraulic actuation systems. "Piston pumps are a good niche for us," Waltz says. "These are the most critical parts we make. There's great variation in materials, design details, process flow and assembly requirements, but the parts do have fundamental similarities."
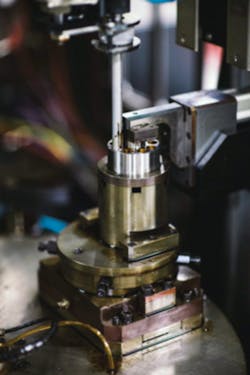
The heart of the pump, called a cylinder block or rotor, starts as a turned blank up to eight inches in diameter. Then, nine circumferential piston bores from 0.1875 to 1.5 in. (4.8-38.1 mm) diameter are roughed in on a machining center, and the part may be heat-treated.
The piston bores are not through holes, but have small kidney-shaped slots cut through the bottom. Some designs call for heat treating, use of bronze bore liners, or bronze plating on the bottom of the part, its running face. Liners may be cast in or produced on Waltz's screw machines, then anchored into retaining grooves with a ballizing process or swaging.
"Nine bores are common to most all pump designs," Waltz explained. "We buy the raw stock and manufacture the cylinder block blank complete. We also manufacture several different parts that work within the final actuator assembly, including the pistons and 'slippers.' The pistons have a total diameter tolerance of 0.000120 in. (0.003048 mm), while the bore IDs on the cylinder block have a total diameter tolerance of 0.000240 in. (0.006096 mm). We must also maintain tolerances of 0.000020 in. (0.5 µm) for bore roundness, 0.000040 in. (1 µm) straightness, 4-8 µin (0.1 - 0.25 µm) Ra bore finish, and less than 3 µin (0.07 µm) surface on the pistons. We have three Zeiss CMMs that can scan the piston bores at various levels for cylindricity, too. All these parts are serialized, traceable to the material and processes used to create them.
"During prototyping, we determine where to leave needed stock on the part, but we fine-tune the stock allowance over time and tweak our processes to be as efficient as possible. For example, heat treated parts are often carburized which creates only a thin layer of surface hardness at about 54 HRc. Thus, we want to remove as much metal as possible before hardening, so we aim for 0.0010 in. to 0.0015 in. (0.0254 - 0.0381 mm) honing stock in the bore in the hardened state. Parts with bronze bore liners are, of course, a different story."
Hone, Measure, Repeat
Waltz had been using standard horizontal honing technology from Sunnen, where outcomes are heavily dependent on the operator's skill. "The operator would hone one bore, clean the part, air gage it at three different levels and then at 90 degrees bottom/middle/top to see if there's any issue, such as taper at the bottom of the bore which would have to be feathered out," he explained. "There's a tremendous amount of back-and-forth to complete nine bores, and if you blow one bore, you've scrapped a part valued at several hundred dollars.
“After honing, we must have confirming CMM inspections on each part, each bore, and this becomes part of the manufacturing history for each block,” Waltz detailed. “Honing and inspection could easily take two hours per part.
"Our challenge to Sunnen was to automate everything, including part indexing, air gaging, and recording of gage readings for the part's history. We achieved all this with the new Sunnen SV-1015, but it was one of the new patented standard features in this machine – multi-feed honing – that has played a role in taking our honing process capability to a new level," he said.
The new patented multi-feed honing capability gives users a choice of tool-feed modes to achieve the shortest cycle times, lowest part cost, and longest abrasive life. Multi-feed combines Sunnen's new controlled-force tool-feed with its existing controlled-rate feed system. The two different modes allow the user to select the better option to suit the workpiece geometry, material and tool type/size.
Typically, a production honing process is set up to use an abrasive tool with a combination of grit size and bond optimized for specific part conditions. Tool expansion to achieve the desired results and final size is programmed according to rate of time. However, when a batch of parts comes in with a different heat treatment, distortion, or a size variation, the operator must intervene because the tool may expand too quickly and be damaged.
In the opposite case with a softer-than-normal or oversize workpiece, the tool still will expand at its programmed rate, when it might have been able to expand faster to reduce cycle time. Expanding too slowly may result in glazing of the honing stones too, which won't self dress if the cutting force is too low. Typically, the operator tweaks a rate-feed system periodically to compensate for these variables.
By servo-controlling the force in the tool feed system, however, the machine can sense and compensate for these variables. The controlled-force feature, which works in concert with the machine's standard rate-feed system, functions like cruise control to maintain the optimal cutting load on the honing abrasive throughout a cycle, irrespective of the incoming part's hardness, geometry or size variation.
"In effect, the machine adapts the tool to what is happening in the bore when the abrasive contacts it," Waltz said. "This 'smart tooling' is an advantage when we are honing rotors with sleeved bores, because the liner sometimes has a little memory and can spring back. The new machine recognizes these variations, adapts, and produces bores with exceptionally consistent size control. It may even shorten or lengthen the normal cycle time as it adapts to part conditions."
Smarter Honing Details
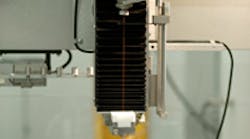
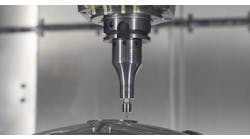
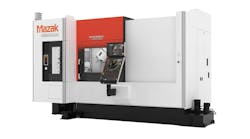
Waltz's new SV-1015 vertical CNC honing machine has a single 5-hp AC spindle with 10-hp servo stroking system and X-Y air bearing table. The operator loads the workpiece in a dedicated fixture that uses the part's kidney slot as a locating feature.
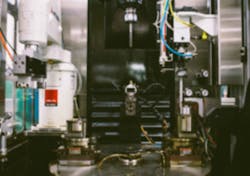
After each bore, the table indexes 90 degrees to an Etamic air gaging station where the necessary readings are taken and stored. If the bore passes inspection, the table moves the part to a robot that indexes it for the next bore, duplicating this routine eight times to complete a part. A fixed position master set ring inside the machine's work envelope ensures correct gage calibration for current environmental conditions.
"On a recent project with an allowable bore tolerance of 0.000240 in. (0.006 mm), we easily held a tolerance range of 0.000060 in. (0.001524 mm) – that's 25% of the total allowable tolerance, and we tripled the previous production rate, while reducing the labor component by 80 percent so the operator can do other work in the cell," said Waltz.
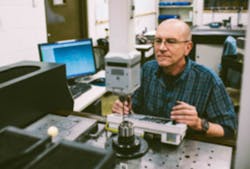
"We know from re-inspecting the parts on our CMMs that the results correlate well. The process capability and data reporting features in the machine have been a great advantage to us and our customers, allowing that data to be downloaded to a spread sheet or SPC software.
"It took us a long time to make the purchase decision on this machine after it was designed, but with our volume and mix of parts, it has proved easy to justify, especially now that we've seen customers as excited about it as we are."
