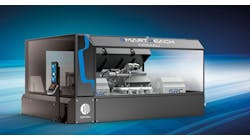
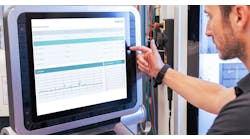
Omax checks its waterjet machine accuracy using laser calibration.
After purchasing an Optodyne laser calibration system to ensure linear accuracy of its machine tools, Omax Corp., a manufacturer of waterjet and abrasivejet cutting systems, improved field service, validated vendor-supplied components, such as ballscrews, and provided accuracy information that allowed for better-informed purchase decisions by its customers.
The company had been troubleshooting accuracy issues, and called a calibration service. While the information gained was valuable, the outside service proved costly, so Omax incorporated the economical and portable system from Optodyne.
The system generates straightness and squareness information, which Omax provides to its customers and uses to determine if a machine’s performance meets customer needs.
“Publishing the linear, straightness and squareness information of our systems has been beneficial because now the customer has ample information to make a better informed purchase decision,” Dr. John Olsen, Omax vice president of operations, said. “It’s been a powerful marketing tool because few other manufacturers bother to publish this valuable performance data.”
The measurement of linear accuracy calibrates the distance between points along an axis, but linear measurement does not consider straightness or squareness. Optodyne’s system helped Omax discover a periodic error of its ballscrews and pinpoint several other sources of machine error so that corrective action could be taken to improve accuracy.
According to Olsen, temperature control is especially important when calibrating large machines. The larger the machine the more susceptible its ballscrews are to thermal growth.
“Every degree change in temperature changes the linear accuracy of a 100-in. ballscrew by 0.001 in. across its length,” Olsen added.
Optodyne’s system fits in a large briefcase for field service calls.
Because it’s based on Laser Doppler Displacement Meter technology, the system requires only two optics that easily mount on machines for fast setup and beam alignment.
During the measurement process, users position the system’s reading head at the home position and specify the measurement increment. When the machine moves, the system automatically senses movement, and after an operator-defined interval, the table stops and the system automatically collects data. This process repeats at each specified measurement increment along the axis length.
Deviations between the scale and the positions measured by the laser are identified, which are used to calculate a compensation table. In some instances, a single linear correction factor can be used. In others, nonlinear incremental correction factors must be applied. Additionally, the system’s metrology software automatically generates a compensation table in the format of many leading controllers.
Optodyne’s laser meets NIST traceability requirements and features a stability check of better than 0.1 PPM, accuracy of 1.0 PPM and resolution to 1 micro inch. Also, the system automatically compensates for environmental factors that include barometric pressure, air temperature and material temperature, then compensates for thermal expansion.
“This laser calibration system allowed us to improve our products and processes in many ways that we discovered only after we had purchased the system and used it,” Olsen said. “The ability to make critical information about system accuracy that our competitors do not provide to customers has helped us immensely.”
