Workers at Voith Hydro Inc. in York, Pa., mark the weight on parts that are less than five tons. But it seems pointless when most of the machine tools in the shop can easily handle parts weighing hundreds of tons. And one machine in particular is the giant among giants.
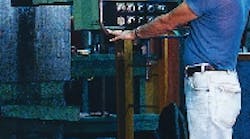
This beast of a vertical boring mill handles parts weighing over 300 tons.Voith Hydro Inc. relies on it for machining such parts as these turbine blades. The company rebuilds components for the hydroelectric industry.
Big parts call for big machines. At Voith Hydro Inc., this lathe provides 124 in. of swing and 55 ft. between centers, while handling up to a 160-ton part.
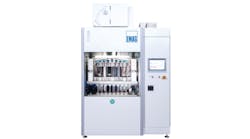
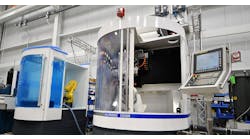
Swiss-style lathes from Marubeni Citizen-Cincom tackle tricky multiaxis jobs with ultratight tolerances. The key to Micro Med's success is using only one setup on these machines.
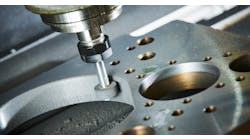
All of Micro Med's jobs are machined from barstock on Swiss-type lathes. The parts are then hand-deburred.
Micro Med routinely machines medical parts with diameters as small as 0.010 in. These parts are frequently used in Class III medical devices such as invasive surgical instruments and implants. Among the products machined are bone screws, catheter components, and pacemaker leads. The company also makes parts for the aerospace and connector industries.
Micro Med makes its tiny parts from materials including titanium, stainless steel, precious metals, nickel alloys, brass, and aluminum. Parts such as pacemaker leads (shown at top right) are held to tolerances of ±0.0002 in. The company says its biggest challenge is not in making these parts, but in verifying size and surface measurements.
Imagine spending 45 minutes painstakingly machining complex features into a part — slots, grooves, angled holes, and the like — until it's practically perfect. After all this work, someone sneezes, the part drops to the floor, and everyone gets down on hands and knees to look for it. But to no avail; it's gone. Hard to picture? Not for those making parts with overall sizes as small as ten-thousandths of an inch.
It's a Mesta vertical boring machine remanufactured by Dorries of Germany, and Voith uses it to rebuild hydraulic turbines for the hydroelectric industry. The company restores these turbines to like-new condition and increases their power output to generate more kilowatt hours.
According to manufacturing manager Steven Schmidt, the now CNC machine plays a critical role in the manufacturing of turbine components. Voith machinists re-bore the headcovers and bottom rings so that wicket gates and bearings on a vertical shaft accurately line up. These components vary in size depending on the unit. Smaller turbine components weigh 2,000 or 3,000 lb, while the ones run on the big Dorries can weigh more than 300 ton, measure 10-ft tall with 36-ft diameters.
The machine is built to handle the big stuff, having a 38-ft, 219-ton table that rotates at a top speed of 12 rpm. Two rams, one of which has a live spindle, feed out 10 ft, and the machine's adjustable columns provide up to 19 ft under the tool.
Parts, setups, and tooling
According to Craig Stinson, the area leader in maintenance and assembly at Voith, the heaviest load ever placed on the vertical boring machine weighed in at 300 ton. Operators used finite element analysis to determine a setup for the least amount of table deflection.
Voith works on basically two different turbine parts — stationary components such as the head-covers fabricated from carbon steel and rotating components such as the runner or turbine rotating piece made of stainless. Overhead cranes haul parts to the machine where operators secure them with as many 1 1 /2-in. studs as possible.
Setup equipment must be beefy, but the real challenge is getting the part's locating surfaces parallel and square to the machine. It takes more than just a few taps with a brass hammer to move these mammoth pieces. Setup begins by running an indicator along the part in to find where it's off. The company then makes adjustments using hydraulic jacks and strong shims. It sounds easy, but those final adjustments — usually just a couple thousandths of an inch — take some time, says Andy Hess, machine shop area leader.
"You don't just plop a 300-ton part anywhere on the machine's table," adds Stinson. The machine can handle parts loaded on one side of its table, but rotating it is not recommended under these extreme conditions. However, hydrostatic bearings equalize fluid to each bearing pad under the table, so workpieces don't always have to rest in the exact center of the table.
In extreme conditions, such as with a two-piece unit weighing 200 ton, mating halves are often loaded one at a time, then bolted together on the machine. Operators can also load counterweight onto one side of the table, rotate it, load one half of the unit, and roll the table back. Once the table is in position, they remove the counterweight and load the other half. This method provides the least amount of table deflection, reports Voith.
With the vertical boring machine's 345 hp, burying an insert to a 1 / 2-in. depth is no problem.
But Voith machinists don't do it on a regular basis because the force causes some parts to vibrate. A standard depth of cut is a 1 /4 in. for roughing operations, feeding as fast as 0.045 in./rev at 500 sfm for low carbon steel.
For the most part, Voith uses big stock tooling on the Dorries: 1 1 /4-in. shanks for turning tools, 1-in. square inserts for durability, and off-the-shelf tooling for the live spindle. But it will make custom boring bar extensions.
Holding size
On small machine tools, operators can place parts on pre-machined fixtures, hit the start button, and go. With really big machines, however, measuring parts, holding sizes, and achieving good surface finishes is a major undertaking.
According to Dave Bahn, a retired manager of facilities and manufacturing technologies at Voith (now consulting), there is no such thing as an affordable mistake on big machines, especially with parts that take anywhere from 8 to 500 hr to complete. At Voith, the goal is zero scrap from the big machines, and it accomplishes this by doing a lot of measuring — more than what's involved with a regular-size machine.
Voith operators know where and when measurement is critical. Parts aren't finished and then checked; they are checked throughout the entire process — during setup, rough machining, and before and after finish machining.
When working with stainless steel or aluminum bronze materials, part and measuring device temperature can affect a size reading. In these situations, operators lay gaging instruments on the part until both are the same temperature.
Besides using wooden supports so that I.D. mics don't sag, machinists at Voith also gage large parts with a customized pipe mic. It's an enlarged inside-mic head with sections of calibrated pipe (precision-ground tubing). These sections are 10-ft long, which, put together, measure over 40 ft.
There are also situations where gaging instruments, standard or custom-made, won't work. For these, operators rely on the machine itself to reference off of a particular surface. "It's an accurate machine for its size," says Hess. On some of the part sealing and bearing areas, the Dorries holds a 0.005 T.I.R. and concentricity to within 0.002 in., along with other dimensional sizes.
Tool wear, which can be more of a problem on long and heavy cuts, will not only affect part size but also surface finishes. Voith machinists set parameters that deliver the longest possible tool life, especially during finish cuts. Having to change tools in the middle of a finish cut can cause an unwanted step, non-uniform surface finish, and an undersize part. Operators must run a pass with a new cutter and then check the part before taking it to finished size.
Micro Med of Miami Lakes, Fla., knows the problem all too well. Says Joe Davis, vice president, "We've even had parts stick to the bottom of someone's shoe. You spend 20 minutes looking for it, and there it is, ruined." The company specializes in machining medical parts with some diameters as small as 0.010 in. and holes even smaller.
Among the products Micro Med makes are catheter components, pacemaker leads, and small jaws for holding biopsy tissue. All machining involves tiny, intricate components, which are held to a ±0.0002-in. tolerance. "When we first started in this business," says Davis, "we would ship parts in sandwich bags. One bag might hold $15,000 worth of parts and probably represented six weeks of work."
Micro Med machines all its parts from bar-stock, mainly on CNC Swiss-style lathes. In most industries, these types of machines are often producing large numbers of parts or part families. However, Micro Med pushes its Swiss-style machines to the limit, proving that these machines can produce small batches too.
One setup is the secret
"We hate to give into a secondary operation," says Davis. The more a part is handled, moved, and refixtured, the greater the chance for damaging delicate walls and other features. If a secondary operation is necessary, it usually means that the lathes can't handle the part geometry. In this case, the part is moved to one of the company's other machines, such as its mills, grinders, or EDM systems.
Even though the company has plenty of equipment to choose from, it prefers to do 100% of its dimensional work on any of its 54 Swiss-style machines from Marubeni Citizen-Cincom Inc., Allendale, N. J. Running at high speeds, the machines crank out batches that average 800 pieces/ run, and turnaround on jobs is typically six to eight weeks.
Where the CNC Swiss-type machines excel, says Davis, is in the flexibility provided by their multiaxis capabilities. "A lot of people get confused when you say multiaxis," explains Davis. "We're not talking about different axes of movement in a plane of geometry. When someone says 'a machine has 12 axes, ' you're talking about independent axes that you can control. Yes, two of them might move together in an X direction, but they are independent features on a machine."
This flexibility means that if Micro Med drills offcenter holes in a part face, it can use a live spindle to move in and then offcenter. The machines can also maneuver into position and cut angled holes or slots. The more axes the machine controls, the more options it has when manufacturing a part.
Micro Med is quite happy with its Citizen E16J and M20 CNC automatic Swiss-style lathes, but it is always on the lookout for newer systems with more capabilities. "As far as we're concerned, a machine that is five years old is outdated, because the technology is changing so quickly," remarks Davis. For instance, the company started out with cam machines in its arsenal, but quickly moved to all CNC systems.
Operators set up jobs using microscopes, some of which are mounted on the machines. Once the lathe starts, though, operators can't visually judge how a part is shaping up or make corrections on-the-fly. "We've hired operators, skilled workers coming out of the aerospace field, who had problems dealing with the idea of machining something they couldn't see."
Although the company has plenty of machining capabilities under its own roof, it sometimes farms out jobs such as EDM work. But, says Davis, "Finding vendors that can deal with tiny parts is hard." EDM houses can't always get their electrodes down into Micro Med's tiny parts, and customized tooling and fixturing become necessary, adding extra costs.
Tools and fixtures
Roughly 65% of the parts Micro Med makes are titanium, another 25 to 35% are stainless steels, and 5 to 7% are precious metals. Making these parts is hard enough, based on size alone, but the material makeup can add a new wrinkle to the problem. For instance, the leads for pacemakers are made of platinum and iridium, which can be rough on tools.
One might think that many of Micro Med's applications require specialized tooling. However, the company's standard tooling isn't all that specialized; it's, well, standard. But the company does ensure that its tools are sharp and that they accurately cut small parts.
In its early days, Davis admits, Micro Med bought off-the-shelf tools, which it cut down for specific applications. Today, though, the company uses production tooling from companies like Kennametal and Sandvik. It also tries to use standard fixturing. In fact, most of its custom tools and fixtures are found only on machines performing secondary operations.
Final touches
A large percentage of the parts must be hand deburred. "There is an unspoken rule in the medical field that the cosmetics of the part must be perfect," says Davis. Therefore, tool marks, scratches, and burrs are unacceptable.
Obviously, hand deburring takes quite a bit of time. Workers, mainly women who can handle the arduous task of hand debur-ring parts under a microscope, use X-Acto knives and some customized tools to deburr every part coming off Micro Med's machines.
But why not use deburring equipment? According to Davis, electropolishing and grip blasting don't work well when you're dealing with small, fragile parts.
Too tiny to tell
"We feel that we have the capability and repeatability to make exceedingly small parts with the equipment we have," says Davis. One of Micro Med's biggest concerns is verifying a dimensional or surface measurement. "We can know that a part is perfect, but we can't always verify it," he explains. That's why, before a job is even started, the company and its customers try to agree on just how parts are to be measured.
Micro Med has used optical measuring devices, such as laser or vision systems, but says they only work to a degree. Part verifi-cation can also take longer than the actual machining. "We may have a 6 to 8-min cycle time, but verification takes 18 to 20 min," reports Davis.
And when it comes to surface finishes, many of the parts don't have enough surface area to check. "It's almost a joke. Engineers will put a surface finish tolerance on a part. For example, in one area they might want a #8 finish." In this case, the company tries to talk its customers into doing a visual comparison, which can be better suited to the job than using devices like profilometers.
The company has also used videoscopes to measure part surfaces. "They can go from 20 to 160 magnification, which is what we need to check a part," says Davis.
Remanufacturing makes a machine what it is todayThree vertical boring machines were made by Mesta Machine Tool Corp. in 1940 to machine large gears for 16-in. gun turrets on battleships. Voith purchased one of the machines from the Navy in the late 1970s. Originally, the machine was a 40-ft vertical boring machine with no live spindle or table indexing capabilities. It had a hydrodynamic bearing and turned at a maximum 4 rpm. But, getting it up to even 2 rpm was difficult with a 100-ton load, says Dave Bahn. These slow speeds limited operators to old-style tooling because the newer tooling requires higher speeds. But all this changed in 1987 when Voith entered a partnership with Dorries to re-manufacture the machine into a modern CNC vertical machining center. The project cost $4.6 million, only 40% of the cost of a new machine says Bahn, and took 26 months. As a result of remanufacturing, the machine now sports live tooling and table indexing. Voith can not only turn, face, and bore large diameters by rotating the table but also index it to drill, bore, tap, and mill with the live spindle. Jobs that were previously completed on up to four different machines can now be entirely machined on the Dorries in a single setup. The new right-side live spindle has 50 kW of power and turns at 600 rpm. This spindle eliminates additional operations in the assembly department. The live spindle machines mating parts separately, but they are so accurate that they can be assembled in the field. Previously, parts were line bored together or handfitted to make sure they matched up. The live spindle boring operation runs much faster than line boring and eliminates the need for two to four-man crews working weeks to preassemble mating parts. For the machine's table, Dorries replaced the original spur drive gear with a helical gear that has a pitch diameter of 32 ft. The table now turns up to 12 rpm, and an added clamp ring provides a braking surface for indexing. This involves a series of calipers that are off when turning, on with low hydraulic pressure when milling or indexing, and completely on for holding table position. Because the machine's rail does not raise and lower, Dorries cast new adjustable columns. For more or less clearance, workers remove the rail and upper column sections as a whole and either add or delete separate column sections for the desired under-tool clearance. The machine's foundation was modified to accommodate these adjusting columns. Voith basically raised the foundation's elevation so the columns mount on the foundation and to the sides of the machine bed. The foundation extends down 15 ft and rests on bedrock that's another 10 ft deeper. The bed's once hydrodynamic bearings are now hydrostatic with an oil distribution system, and its old center bushing has been replaced by an antifriction roller bearing. An added encoder monitors bed speed. Finally, a differential control on the hydrostatic bed cools machine oil to several degrees below ambient bed temperature. This same oil returns to the bed at the bed temperature, minimizing thermal distortion for improved accuracy. |
