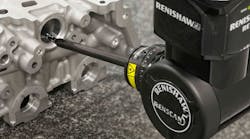
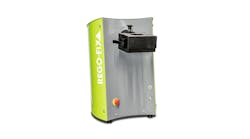
The new SFP1 probe option for Renishaw’s REVO five-axis CMM head reportedly is the first to allow surface finish inspection that is fully integrated within coordinate measurement routines. REVO is a measuring head and probe package designed to maximize CMM throughput while maintaining high accuracy.
REVO uses synchronized motion and Renscan5 measurement technology to minimize the dynamic effects of CMM motion at ultra high measurement speeds. What happens is that the REVO head performs the fast demanding movements as the CMM moves in a slower, linear fashion. Using a flexible tip sensing probe system adds to the system's accuracy and flexibility. The removable probe system, used in conjunction with a low cost changer, provides added system flexibility.
With a measurement capability of 6.3-0.05 Ra, the new SFP1 surface-finish probe makes the CMM a “single platform” metrology system, according to Renishaw. It indicated that the new probe eliminates the need for hand-held surface measurement devices or transporting parts to a dedicated surface measuring machine, which cuts labor costs and inspection lead times. That platform is capable of automated switching between dimensional measurement and surface finish measurement, with the analysis contained in a single report.
The SFP1 probe is a fully integrated option for the REVO 5-axis measurement system: it is supplied with two dedicated styli, straight and cranked, that are selected via the measurement program control using the system’s modular rack system (MRS). The probe incorporates a C axis that, combined with the infinite positioning of the REVO head and choice of stylus holders, allows the probe tip to be oriented automatically to any angle suitable for the the part, ensuring that the surface data is acquired. This provides flexible access to component features, combined with the consistency of fully automated CNC control. Using the straight stylus, the SFP1 can perform a measurement trace within a 10-mm diameter bore to a depth of 100 mm.
A skidded probe with a 2 µm (0.000079 in) radius diamond stylus tip, the SFP1 probe outputs Ra, RMS, and raw data formats to the metrology application software via Renishaw’s UCCServer software, using the I++ DME protocol. The raw data can subsequently be presented to specialized surface analysis software for more detailed reporting.
Also, calibration of the probe is automated under the CMM program. A surface finish calibration artifact (SFA) is mounted on the MRS rack and measured using the SFP1 probe. Then, software adjusts parameters within the probe according to the artifact’s calibrated value.
