When customers insist on quality control and management demands cost control, where should machine shops, metalcasters, forgers, or any manufacturer place the priority? One technology developer settles the question with satisfying simple approach.
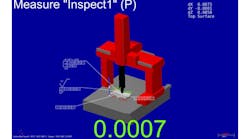
Verisurf Software introduced a manual CMM retrofit offering recently, a method for converting any manual CMM into a high-performance, 3D model-based inspection system by incorporating its Verisurf X6 software and new USB communications.
Verisurf Software Inc. develops dimensional metrology software for advanced computer-aided inspection and reverse engineering. Its software is targeted at manufacturers seeking to produce higher-quality products in less time, at a lower cost, with automated, model-based inspection processes.
“Verisurf software has been powering portable CMMs for 20 years,” explained the company’s CMM business manager, Terry Wear. “We now offer the same ease-of-use and productivity for thousands of manual CMMs, many which struggle with old, outdated or unsupported computers, interfaces and software.”
The surface plates and structures of manual CMMs are designed to last a long time however the communications interface and operating software can become outdated quickly. That will lower the effectiveness of such devices in the advancing environment of manufacturing process and quality control. By retrofitting a manual CMM to run Verisurf Software, the shop can add more functionality and productivity features that are becoming requirements for manufacturing and quality engineers.
Among the functions that can be added are model-based definition/inspection with associative GD&T, read directly from CAD (or from the manufacturers’ own sources). Also, the users’ equipment will be able to share the same software as portable CMMs; read all native CAD formats; create rapid CAD alignments, without iterations; and create HTML, PDF, Excel, or AS9102 reports, including InspectionExpert.
Other new capabilities available for manual CMMs following retrofit are real-time display of complex profile deviations; and digitization, reverse engineering, and solid model creation. They can operate the devices in Windows 7, 32- or 64-bit platforms. And, they can use hard probes to digitize and scan data from finished products, for first-article inspection or other quality control priorities.
Verisurf X6 Software configurations are customized to each application, and supported by Verisurf metrology engineers. For inspection, the software supports modern model-based measurement techniques as well as traditional blueprint measurement processes. Measurement includes CAD model imports of any format; creation of model associative GD&T; automated alignment of 3D CAD models to physical parts; and real-time probe position with deviation display.
Verisurf’s Inspection Pro module includes the inspection functionality with the addition of advanced, 6 degree of freedom best-fitting alignment; auto inspection programming; custom color deviation plots; and results ballooning and analysis reporting.
The Reverse Engineering functions allow users to digitize parts directly into CAD. They are able to create, import, filter, and edit point clouds; create, import, and edit STL mesh surfaces with hole filling, slicing, feature recognition and auto surfacing. Also, they can create and edit NURB surfaces, including extruded, revolved, and lofted surfaces. And, they can create and edit CAD features including planes, holes, and pockets.
Finally, they gain the option to bundle all the functionality of Inspection Pro and Reverse Engineering modules.
Verisurf retrofit packages include a new USB interface provided with the software, configured to customer specifications. Verisurf’s certified technicians complete any necessary mechanical adjustments and complete geometric compensation. Also, a calibration certificate is provided with the new verified accuracy of the CMM.
