The future of in-process measurement might just be
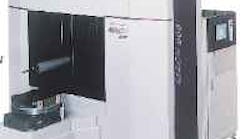
Mitutoyo offers its Mach CMMs in two sizes: the MACH 403 comes with a measuring envelope of 18318312 in. and the 806 envelope is 40332324 in. Each is offered with or without a worktable for integration with machine tools. Both units offer the same speed, accuracy, and environmental stability and can switch probes to handle dimensional and surface-roughness measurement. Windows NT-based GEOMeasure Mach and MeasureLink software are used on the machines. The Machs without worktables are designed mainly for OEM integration with new machine tools, but may be retrofitted onto existing machinery. Once the basic engineering link has been made for a particular model, it is a matter of cloning. The Mach can be fit into machining cells or function as a workstation in a transfer machine.
Mitutoyo has integrated CMM and machine tool: The Mach CMM is physically mounted to a machine tool. Machining and measuring are done using the same two-station workholding fixture, as shown in this aerial view.
One scheme for integrated machining and measurement is illustrated. A MACH 806, operating in-line with a HMC, measures parts mounted on the same pallets used for machining. Though physically separate from the machine tool, the CMM's controls interface with the machine's for real-time feedback. Depending on location in the line, the CMM can perform pre-machining measurements to detect feedstock variations or post-machining measurements for part acceptance and tool-wear compensation. The machines' electronics are communicating, but machining and measuring are still sequential.
A variation of the same concept shows one MACH 403 serving several machines and linking to their respective controls. Machining and measurement are sequential and both have their own worktables; part transfer is robotic. The same scenario can work with part transfer by conveyor.
Schematic shows total integration of machine tool and Mach CMM. On the idle station of a shuttle-type fixture, the high-speed CMM performs measurements at each stage of machining as well as final inspection of finished parts. The integrated CMM provides real-time feedback for fixture offsetting and tool-wear compensation as well as all quality assurance and certification data. According to Mitutoyo, the setup cuts processing costs by 30 to 50% on high-volume parts, boosts throughput, improves yields, virtually eliminates inspection costs, and simplifies part handling. The two machines share the same workholding platform, so machinery footprints and capital costs are also reduced.
For decades, manufacturing and quality assurance managers have looked forward to the era of direct integration of multi-axis CNC coordinate measurement with the CNC manufacturing cycle. The promise is obvious: simultaneous, interactive chipmaking and measurement, with open communication links among machine tool, coordinate measuring machine (CMM), and factory networks.
With it would come order-of-magnitude gains in process control, yields, machine utilization, and throughput; plus equally dramatic reductions in inspection costs, equipment footprints, and capital costs. The main obstacle has been the lack of a CMM fast enough to keep pace with chip-making and rugged enough to survive functionally while strapped to an operating machine tool.
However, Mitutoyo, headquartered in Japan, has overcome these obstacles. The company recently introduced a prototype CMM that is 5 3 faster than anything else on the market. Called the Mach series, these CMMs are robust enough to do their job while fastened to operating machine tools.
The Mach traverses at 1,800 mm/sec maximum triaxial speed, more than 3 3 faster than other CMMs. More importantly, maximum triaxial acceleration — ramp-up speed — is 1.8 G, while most conventional CMMs accelerate no faster than 0.5 G. In fact, the Mach is the first CMM to break the 1-G acceleration barrier. Another important feature of the Mach is contact speed, the rate at which the probe touches the workpiece. The Mach's contact speed is 30 mm/sec, 3 3 faster than its contemporaries. These rate gains let the Mach CMM keep up with full-speed CNC chip-making in an in-process probing/inspection mode.
The Mach CMM is built like a machine tool. Rather than taking weight and rigidity out of the moving parts, designers beefed up the actuators to get more speed out of the CMM. The machine's actuators are precision ballscrews driven by high-power AC motors with AC digital servo controllers. In addition, the Mach's structural parts are made of durable steel, which helps it thermally expand along with the host machine. For the same reason, even the 0.1 micron positioning scales are steel rather than the customary glass.
Even under shop-floor conditions, the Mach CMM's resolution is one micron, which equals or exceeds that of the best available CMM operating in a temperature controlled, vibration-isolated environment. Even over a 50 to 95°F range, the new CMM delivers a volumetric accuracy of 0.00045 in.
Design innovations
Development of the Mach class of CMMs has been a multiyear joint effort between U.S. and Japanese Mitutoyo companies. Key to these performance gains is the use of piezoceramic probing technology, a consistently accurate technology for CMM work. Mitutoyo took the technology and improved its "reseating" accuracy by a factor of five. The high reseatability mechanism returns the stylus to its correct position immediately after its last contact with the workpiece. Also, the probe has been made more rugged to withstand the 30 mm/sec contact speed. These specs were met in the new MTP 1000 probe head.
To enhance flexibility of the CMMs, the unit accommodates a new optical surface-roughness measuring probe, which is interchangeable with the MTP 1000 dimensional probe. The same unit measures both dimension and surface finish. The two heads are indexed using a Renishaw system.
Two other engineering developments are worth noting. One is the aforementioned steel position-indicating scales to replace the traditional glass scales. Conventional wisdom has been that glass position-indicating scales are always more accurate than metal because glass has a lower coefficient of thermal expansion. This is valid for scales used in a controlled environment off the shop floor, where the goal is minimum absolute thermal expansion. However, on an operating machine tool running on the shop floor, the real issue becomes minimizing the effects of differential thermal expansion between the scales and the rest of the structure.
Physical survival of the scales also becomes a problem in shop-floor service. Thus, Mitutoyo developed steel position-indicating scales with a resolution of 0.1 micron while mounted to a "live" steel structure in an environment ranging from 50 to 95°F.
The other engineering development is CMM software able to interface with the host machine's chipmaking software. The Mach CNC control hardware and software are designed for cell control and PLC interfacing to facilitate integration. It can work with new or existing systems using robots, conveyors, or pallets. The controller features four digital signal processors and a 250 µsec position loop. Designed and built by Mitutoyo, the controller is more powerful than any typical RISC-type controller. For instance, the fast repeat routine, an essential part of every program, is 40% faster than conventional systems.
The Mach CMM software integrates with the host machine's software for program control and feedback for fixture and tool-wear offsetting. It also offers open communication with the plant network.
The possibilities
This new probing technology has opened up three principal opportunities for production tech-nologists: shop-floor CMM, in-cell CMM, and on-machine CMM.
A shop-floor CMM reduces part handling and lets the machine operator take more measurements to better control the process. For instance, the CMM can assist an operator in limited probing for fixture offsetting. When run in its near-machine mode, the Mach speeds measurement while the operator is running the chipmaking machines. However, the chipmaking and measuring machines are still separate, and the two operations are consecutive, so the CMM is doing workpiece inspection only.
Measurements for tool-wear compensation and fixture offsetting for workpiece variations must still be done at the machine. This reduces chipmaking time and requires that slots be left open in the tool magazine. These functions also involve a substantial manual component.
Similarly, in-cell CMM technology has been practiced, with the benefit of less part handling. Again, the two machines remain physically separate, operations remain consecutive, and the CMM's role remains largely one of finished-piece inspection. There is little, if any, help from the CMM in tool-wear compensation or fixture offsetting.
When the CMM is fully integrated with the machine tool, however, machining and measurement become simultaneous. Plus, the CMM can for the first time take over tool-wear compensation and fixture offsetting measurement functions — all hands-off under program control. This can take a big bite out of labor costs and dramatically boost throughput and machine utilization. By measuring parts loaded in fixtures prior to machining, the CMM provides data for fixture offsetting to compensate for variations in the feedstock.
Similarly, real-time measurements on finished parts can pick up variations soon enough for use in controlling tool-wear adjustments because the pieces are in place. These options were not available with older, slower CMMs.
Linking the two machines and sharing the same workpiece platform also lead to savings in part-handling and inspection time, equipment footprints, and capital costs. But the main impact will be felt in throughput, machine utilization, improved yields, and process control due to simultaneous machining and measuring.
A piece of the pie
Based on feedback to date, the biggest beneficiaries of the new Mach CMMs will probably be companies that handle dedicated high-volume machining of castings. This is mainly because correction for variations in the blanks themselves is such a costly factor. Other early beneficiaries are expected to be those with long-run, high value-added machining operations and those who tackle close-tolerance machining of expensive materials where yields are a high priority.
By contrast, shops handling mainstream short-run machining should not expect to see integrated machining and CMM measurement in the near future. The reason being that short-run work rarely has a CMM dedicated to a single machine tool in the first place. Second, runs may not be long enough for tool-wear compensation to become an issue. So the additional programming for integrated machining and measurement would not likely pay off.
