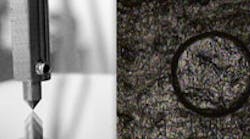
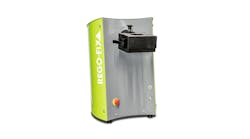
Using Nanovea’s Mechanical Tester in indentation mode, with a cylindrical flat tip, it’s possible to obtain tensile-yield strength data that correspond directly to macro tensile data.
Nanovea, a developer of mechanical testing and coordinated measuring systems, introduced a patent-pending method for measuring yield strength through indentation. It calls the Nanovea Mechanical Tester a “breakthrough” that will ultimately replace traditional tensile testing machines.
The yield strength (or “yield point”) of a material is determined by identifying the stress point at which plastic deformation begins. Before reaching the yield point a material will deform elastically, but it returns to its original shape when stress is removed. It is a critical data element for understanding properties of advanced materials in industries like biomedical, microelectronics, and energy, among others.
Typically, yield strength is determined using a tensile testing machine, a large instrument that requires high strength to pull apart metal, plastic, or other materials. In addition to the capital investment in the machine, the process consumes a lot of material, and involves a lot of effort, including sample preparation. Even so, it may be impossible to test yield strength on small samples and localized areas.
Yield strength data is easy to determine using Nanovea’s Mechanical Tester in indentation mode, with a cylindrical flat tip. The indentation test has been used for hardness and elastic modulus measurements, but it has been difficult to link macro tensile properties to what was measured during an indentation test. Many studies measuring with spherical tips have allowed stress-strain curves, but these never have been able to give reliable tensile yield strength data that corresponds directly to macro tensile data. >
The Nanovea method, using a cylindrical flat tip, returns a yield-strength directly comparable to what is measured by traditional means. The assumption is that the load per surface area at which the cylindrical flat tip penetrates, at increased speed, is directly linked to the load versus surface area at which the material starts flowing in a tensile mode test. Therefore, reliable yield-strength results can be never gathered on numerous materials for which it has never before been obtainable.
"This is just another addition, on a long and growing list, to what can be tested with our mechanical tester," according to Nanovea CEO Pierre Leroux. While this specific test is a breakthrough of great importance, it is also evidence that the Nanovea Mechanical Tester has the widest testing capability of any mechanical testing system.
