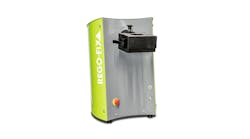
The decision to add a high-speed-scanning CMM should be based largely on what it does, not how much it costs.
Measurement uncertainty drops dramatically as the number of data points increases. High-speed-scanning CMMs collect hundreds of data points in a short period of time.
For those investing in high-speed-scanning CMMs the payoff is increased throughput, reduced labor costs, and the attraction of new business.
High-speed-scanning CMMs provide a hard-to-beat combination of speed and accuracy. But many jobshops are leery of the technology, concerned about its cost and complexity. But they shouldn't be, says Mark Davis, tool engineer with Superior LLC, Maple Grove, Minn.
Superior, a small contract manufacturer, provides high-precision gaging and tooling to computer hardware and medical-device companies.
It sees its high-speed-scanning CMM as an investment, rather than an expense, that will help it compete. "For a smaller company, particularly a jobshop, it's challenging to justify a significant piece of equipment that doesn't directly produce income-generating parts," Davis comments. "We decided if we're going to be in the high-precision-tooling business, this is where we need to be." Two years after installing a Prismo VAST, made by Carl Zeiss IMT Corp., Minneapolis, Davis estimates that 90% of the hundreds of inspections Superior conducts daily on its scanning CMM couldn't have been completed previously in-house.
"Adding scanning capability elevated our inspection processes to match the machine tool capacity our customers require," says Davis. "A lot of new business came after we upgraded our measurement capability. The majority of those contracts are CMM-qualified prior to winning the business. If we pass the inspection test, the business is ours."
In the past, the cost of purchasing a system capable of collecting hundreds, or thousands, of data points in a reasonable amount of time was prohibitive. As a result, most shops settled for single-point probing with trigger systems. However, in the past six years, the cost of near-reference-class scanning has dropped 40%, making them more attractive cost-wise.
According to Richard Knebel, Zeiss' director of product development, there's overwhelming scientific merit for scanning. "Measurement uncertainty drops dramatically as the number of data points increases." He adds that companies like Superior have the right attitude when it comes to high-speed-scanning CMMs: "They see high-speed-scanning as a step up. Scanning-driven time reduction can increase throughput several times over. And scanning-based flexibility and efficiency save significant capital and labor costs." This is because scanning eliminates equipment and gaging setups.
Other shops still view scanning with a certain amount of skepticism. "At those shops," says Knebel, "scanning is seen as the superior method, but there's anxiety over what could come from having better data. We've seen that become a fundamental hurdle. In that mindset, the focus switches from 'What are the possibilities?' to 'What's going to pop up in this data set that I've never had to deal with before?'" Knebel doesn't believe the accuracy of a high-speed-scanning CMM is overkill. "I believe all workpieces should be scanned," he says. "Parts fit together in three dimensions, which means that how they mate cannot be predicted." Because of this, he explains, there is no reliable way to determine where to take a couple of touch points with a touch-trigger system. "There are some very accurate touch-trigger systems, but the main contributor to measurement uncertainty is the part itself," says Knebel. "So unless we're speaking about nearly perfect artifacts like ring gages, things get unruly relatively fast. And the more unruly parts get, the more data we ought to pursue and apply to have the best chance to find the real value." As for the thought that there is a point of diminishing returns when it comes to gathering data points, Knebel explains that this occurs only after collecting several hundred data points.
As the number of scanning CMMs on the market increases, so does the confusion for potential buyers. "The good news for everyone is that scanning understanding and interest has taken several steps forward," Knebel says. "On the other hand," Knebel warns, "all scanning systems currently available on the market are not equal." While there is a myriad of scanning CMMs that provide hundreds of data points, not all provide data of the same integrity, and their performance reflects that. In addition, different scanning solutions have different abilities when it comes to maximizing accuracy.
"The higher-quality offerings tap more of the potential that's inherent in the math," comments Knebel. "Low-end systems scan in the most basic mechanical sense, but they are underequipped to deliver top-quality data." The reason for this, Knebel says, is found in four key areas: machine construction, the control system, the sensor, and the software. In turn, each of those areas can be traced to construction philosophies.
The differences among scanning solutions, says Knebel, is in how different CMM makers build them. Zeiss uses a system-optimization approach and believes that a high-speed-scanning CMM should be built from the ground up with all of its key components engineered for scanning. Other manufacturers of scanning CMMs simply add a scanning sensor to an existing machine, controller, and software package. "This bolt-on method is cheaper," says Knebel, "but users face significant probing uncertainties if the components aren't well matched."
For example, the machine stiffness of a scanning CMM needs to be greater than that of a touch-trigger system to support data acquisition at high speeds. Often, a machine not designed for scanning can't handle high-speed data acquisition because the geometry of the axes is compromised. "A machine can literally be shaken outof-square under the loads created during high-speed moves," Knebel says, "and that's an accuracy issue. Even worse, going out-of-square is a real-time, temporary deformation. It doesn't stay out-of-square, so it's not immediately evident whether the part of the machine caused the variability."
All CMMs deform to some degree when the probe is driving. The key, Knebel explains, is how well the system controls the deformation at the exact moment of data acquisition. This may seem surprising because some touch-trigger systems are specified to support a probe that moves at 300 mm/sec. However, that rate only occurs as the probe moves from point A to point B. Just before the probe strikes, it slows to around 5 mm/sec. At that speed, machine deformity
is a nonfactor. However, it's a different story at the 80-mm/sec speeds found on high-speed-scanning CMMs. Multipoint scanning measurements performed at continuous high speeds put data integrity at risk unless the system minimizes machine deformity under dynamic loads.

