With well over 100 hard gages like this, each one costing up to $20,000, Meyer Tool recognizes the potential cost advantages of a flexible, software-driven gaging system. Design changes on a part may add another $3,000 to $10,000 to re-configure and qualify an existing hard gage. Renishaw’s Equator can be reprogrammed to accommodate part changes.
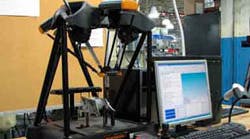
A software-driven comparative gage – the new Equator® system from Renishaw Inc. – is already starting to reduce the production cost at Meyer Tool Inc., a manufacturer of aerospace engine components. In its pre-launch application, one Renishaw Equator gage has eliminated at least four costly hard gages in a new work cell. And that's just the beginning of the effects the shop anticipates for its custom hard gages, which may cost up to $20,000 each to design, build and maintain, according to Beau Easton, quality manager at Meyer Tool. The Cincinnati company designs, builds, and maintains dozens of these costly gages every year for in-process measurement. Down the line, design changes on a part may add another $3,000 to $10,000 per part, to re-configure and qualify an existing gage.
For in-process dimensional measurement, Meyer Tool principally relies on work-cell-based point-to-point contact gages, using pneumatic digital probes. Hard gages in the machining cell give very fast feedback, but they are expensive. Design/build cost for the part nest can run to $6,000, with probes adding over $500 each, along with verification studies, and maintenance, Easton explains. "If we are producing a make-complete nozzle, there could be six to 10 fixtures, each with six to 20 probes, and if a feature or tolerance on the part changes, it adds time for the gage to be altered and verified."
When they were shown Renishaw's Equator comparative gage and offered a pre-launch trial, Easton and SPC manager Bridget Nolan said they immediately recognized the potential. "We got involved with Renishaw's introduction of the system and provided parts. Renishaw programmed them, and the results matched our Coordinate Measuring Machine (CMM) results," said Nolan, whose group sets up, maintains and programs the company's gages, fixtures and instruments.
Comparative gaging, mastering and repeatability
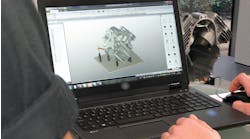
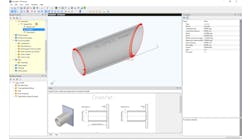
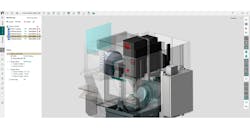
Though its appearance is unusual, the Equator system uses the comparison method of mastering and measuring familiar to anyone who uses dedicated gaging systems. A master component with features of known dimensions is used to "zero" the system, with all subsequent measurements compared to this part. The key to the Equator system is a highly repeatable and radically different metrology mechanism based on a parallel kinematic structure. This mechanism is lightweight, allowing rapid motion, yet very stiff and repeatable. The system uses Renishaw touch and scanning probes, styli and stylus change racks, and MODUS™ Equator programming software. Three to five hard gages in a Meyer Tool work cell can be replaced by a single Equator, and the Equator can be used to monitor multiple parts at the same time, switching between them in seconds, as well as reprogrammed for many other parts over its life.
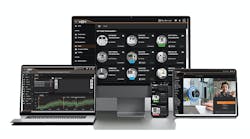
The first Equator system is assigned to a lean machining cell in Meyer Tool's shop. Demonstrating its adaptability, it integrates with Meyer's Orion SPC system, maintaining a familiar look for machinists and shortening the learning curve. Orion communicates with the Equator's MODUS software, presenting the operator with results in the form of dimensional data, SPC charts, etc., that allow the operator to determine CNC offsets. "Keep in mind the machinist sees variable data and can compare the current part with recent measurements, so it's not just a pass/fail determination," Nolan explains. The parts must meet tolerances of ±0.001 to ±0.003 inches. Inspection time varies with the part but typically takes two to six minutes, well within the TAKT time of the cell so the system easily keeps pace with machining operations.
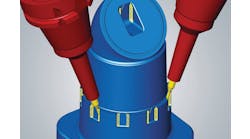
"We already gage five part numbers for two different engine programs, so we have multiple fixturing tiles for the Equator set up and qualified," Nolan said. "We try to combine as many different operations on one tile as possible to limit our qualifications, and we're currently working on one tile that will combine three. We are doing GD&T true positions, notches, hole diameters, profiles, runout, and such with touch probing, though we are implementing contact scanning with the SP25M probe. We have the stylus changing rack and use at least four different styli – frequently star styli – so it's very convenient not to have to requalify with every change."
Measurements traceable to absolute CMM standards
The Equator measurements at Meyer Tool are correlated with those from a CMM, using a CMM-calibrated master part. "The master part sets the values the Equator expects to find inside its measuring envelope while the software automatically applies the compensation values from nominal taken by the CMM," Nolan explains. "It must check within 10 percent of allowable tolerance from nominal." There is no need to re-master on every part change, though Meyer does re-master on a 3-hour schedule to compensate for changes in the plant's temperature. "The Equator system memorizes the master parts and validation scores, so we can switch parts as many times as needed during the 3-hour window, and not have to re-master," Nolan said.
Meyer Tool produces hot-section jet engine components for aerospace OEMs, employing more than 1,000 at 10 locations. The Cincinnati headquarters specializes in new parts, while some other Meyer shops do repair and overhaul for the OEMs. Its principal workpiece materials are super alloys, nickel, and cobalt-chromium based.
With nearly 500 fast-hole EDM drillers, Meyer Tool is North America’s largest EDM-based manufacturer. These machines are supplemented by 45 grinding stations, more than 300 conventional ram EDMs, as well as CNC 3- and 5-axis machining centers. The company EDM-drills more than 1.75 million holes per day, and with one blocked hole out of hundreds capable of causing failure on military high-pressure blades, Meyer Tool is fanatical about quality.
The company employs 10-15 quality engineers, eight Black Belts, and an SPC team of five. "We began implementing Lean principals more than 10 years ago, followed by AS9100 certification," Easton said. "The investment has paid off, too. Our first time yield rate for January 2011 is 98.9 percent – that is, first time off the machine without non-conformance or reject."
This was accomplished by getting real-time feedback "turned up" to a much higher level, he adds. The information backbone of the company's gaging, SPC and quality system is its own Orion software and workstations, sold commercially through its subsidiary, Sigma Technology Services. All parts are 100-percent inspected by various means, including laser scanning and touch probing on CMMs, 5-axis vision, radiometric measurement and flow path scanning, among others, all of which are networked on the Orion system which serves as a common operator interface on measurement systems.
Measurement programs, results and SPC data are managed by the Orion system. When a machinist completes an operation on a part, its serial number is scanned into the system, the part is measured, and the machinist can immediately see the results and compare them with the last 35 similar parts that have been measured. "You can scan a part's serial number into any terminal in our plant and see its measurement data," Easton said. "This information stays with the part. Before it ships, all inspection data is checked to ascertain that all points passed, and any failed point kicks the part out until it passes all checks. As a result, our ppm 'escape rate' is almost non-existent,” according to Easton. “And, customers recognize this."
With well over 100 hard gages costing $10-20,000 each throughout its facilities, Meyer Tool recognizes the potential cost advantages of a flexible, software-driven gaging system. "We are still expanding our knowledge and capabilities with the Equator system, but have high expectations it will ultimately alleviate a large part of our cost burden for hard gages," Easton added.
