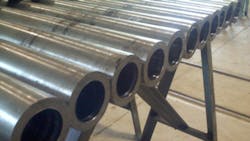
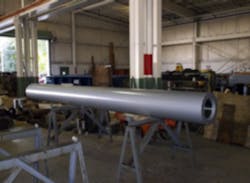
To return to the initial proposition — How straight will the hole be? — this is a question that you must consider when you plan to produce a deep-hole machined part. The planning process should verify that boring can produce the hole as accurately as the application requires, without excess processing. Here, I will try to describe the range of properties of form that may be specified and how they apply to manufacture of machined deep holes especially in round bar applications. This may promote some communication among engineers, purchasing professionals, and manufacturing managers. Sound planning and communication will contribute significantly to a positive outcome in terms of parts that meet spec and thus work as intended.
First, consider the simpler case of rough-bored holes. Rough drilling operations generally allow a wide tolerance for drilling, with no finish requirement, and straightness considerations are minimal. Very deep holes should allow enough stock for clean up after a worst-case runout of 0.001 in. per inch. Therefore, a part that is 180 in. long should allow more that 0.180 in. in the bore for clean-up, or more depending on the subsequent operations.
If such stock is not available, options should be discussed with the manufacturer. Options may include drilling a smaller initial hole, or specifying finish boring with runout of less than 0.001 in. per foot. It is a very good practice to supply a desired hole size and size of the finished ID, as well as size of the OD and finish OD size, when requesting a quote.
When tolerances become tighter and size becomes more critical, it becomes more important to understand the general requirements of straightness or concentricity. To illustrate this, suppose a 4 in. hole has a 0.003 in. tolerance on size and is 10 feet long. Without specific definition on runout, the hole technically should be within 0.003 in. in runout. It may be a simple operation to hold a size of 0.003 in. round and true within 0.003 in. in 6 in. of length, but it’s quite another matter to do it in 120 in.
If requirements allow a larger runout, the feature may be manufactured more readily with a 0.003 in. size tolerance, and a special attribute of 0.012 in. total indicator runout tolerance.
Complete Specifications
Finish-bored holes may be most readily quoted if specified completely for the required application. The following list is a partial summary of the attributes that may be assigned to a deep hole beyond the basics of size, position, and finish. Note that these attributes can be defined further with modifying symbols, tolerances and reference datums.
• Straightness
• Circularity or Roundness
• Cylindricity
• True Position
• Concentricity
• Circular Runout
• Total Indicator Runout.
This selection depends largely on the form, fit, and functional requirements of design for each part. For example, parts that rotate at high speed may require a low circular runout tolerance, but allow a wide straightness tolerance. The main bore may be solely for weight reduction and have no critical fit, meaning a taper or other size variance is allowed, but all parts must be true and round for balance.
Circular runout is better than total indicator runout in this example to allow size variation for economy.
Another part may be of a cylinder and piston application. For economy, various piston rings may be made to allow a large range of bore sizes, but function requires that each piece be of constant size and very straight. In this case a 4-in. bore with a 30-in. depth might have a 0.010-in. size tolerance, with a cylindricity tolerance of 0.002 in. Cylindricity offers composite control of circularity, straightness, and taper.
Other parts may require uniform wall thickness between OD and ID, but allow a wide straightness tolerance. Such parts may hold pressure or transfer heat but be made from long tubing that is not straight. Apart from applying an attribute from the above list, such part drawings have a size and tolerance for the tube wall feature, or a note to maintain a particular wall thickness.
Specifying only a part of the bore to have certain properties is a singular way to reduce the overall cost of a deep-drilled part. Identifying these areas on the drawing can be done by designating a critical zone on the drawing or drawing notes. Also, selecting datum may either improve accuracy or clarity, or reduce cost.
Frequently, the ID of a deep part must be concentric to a long OD with a tight concentricity tolerance. If the whole OD is not critical, specify OD areas at the ends as datum, and leave the balance of the OD with open tolerances.
Sometimes bore concentricity matters only near the ends, so save money by reflecting that on the drawing.
Concentricity is Not Circularity
When applying concentricity as a bore attribute, consider that it does not control circularity. One can have a hole within size tolerance and concentric — and yet is actually egg-shaped. Circular runout is a composite of roundness and coaxiality. Total Indicator Runout is a composite control of circularity and coaxiality plus angularity, taper, and profile of a surface.
For most deep-hole applications, circular runout or total indicator runout is the best way to define and encompass straightness and concentricity requirements of a design. Also, for deep holes, in most cases runout can be read directly with an indicator, though not all shops have this capability.
We have seen that, although many choices exist for defining the form requirements of a deep bore, certain attributes can best apply to certain applications. It is the role of the design engineer to define the proper requirements. It is the role of the manufacturer to confirm manufacturability and machine within supplied tolerances. It is the role of purchasing to convey requirements and communicate questions that arise regarding those requirements.
In general, to maximize cost-effectiveness, specify the roughest operations and widest tolerances. To maximize control of geometry for critical parts, specify tolerances sufficiently for all critical features.
The first installment of this series, “How Straight Will the Hole Be?”, is available here. Part two, “Beyond the Rough, Finish-Bored Hole Straightness, is available here.
For further reading on this topic, American Hollow Boring recommends “Dimensioning and Tolerancing: ASME Y14.5M-1994 (Engineering Drawing and Related Documentation Practices, in. American Society of Mechanical Engineers (ASME), 1995, ISBN-10: 0791822230.
About the Author
Geoff Ginader
President
Geoff Ginader is the president American Hollow Boring, an independent machine shop specializing in deep-hole drilling and large part machining for industrial applications that range from heavy machinery to defense projects. He enjoys solving complex machining problems, and experts at AHB are available to review specific projects.


