It's times like that when the operator shifts from thinking tactically about running the shop and starts to think strategically about how to improve the shop, how to position the shop to be more successful.
It is often those moments that make the difference between a shop becoming an outstanding shop, and just doing the same old thing.
Strategic thinking leads to strategic investment, whether the decision is to buy a new piece of equipment, hire more people or seek new business.
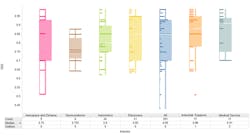
It's times like this when it is really helpful to look at the American Machinist Benchmark Survey to understand what the best shops are doing that other shops are not. Consider the following numbers extracted from the survey:
There are a number of conclusions and inferences you can draw from those numbers, but in general it is obvious that the best shops are almost twice as likely to do precision machining using sophisticated equipment such as multitasking, cellular manufacturing and advanced measuring, all of which usually costs big bucks. But, technology is changing almost daily. What was not possible a few years ago is now affordably available today. Consider the idea of on-machine, CMM quality automated inspection.
A few years ago it was not practical. Today companies such as Marposs, Renishaw, Mitutoyo, PC-DMIS and others make on-machine, CMM quality automated inspection possible, affordable and profitable.
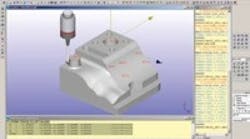
Last September Marposs (www.marposs.com) released its 3D Shape Inspector software as a complement to its on-machine probes. The software allows a CnC programmer to use a CAD drawing of a part to create G-code to inspect that part while it is on the machine.
The code can be embedded in the code used to cut the part and can give the programmer several options. While cutting the part, the machine can periodically or after critical cuts blow the chips off the part and do from a few critical point measurements to hundreds of CMM quality measurements and compare them to the measurements and tolerances specified in the CAD drawing. out of tolerance conditions can generate a report to the operator, provide feedback to the machine for automatic adjustments or simply stop the machine and wait for operator intervention.
This level of on-machine inspection eliminates the need to remove the part from the machine repeatedly to measure it at a CMM. Instead, intermittent measurements can be taken to monitor the process and related conditions and the CMM, often the biggest bottleneck in a shop, can be used for final inspection and validation.
A setup like this – software and installed probe – costs $12,000 to $20,000 depending on options and the amount of programmer training needed. A small investment considering the cost of CMMs, but one that gives the shop immediate process improvement and the capacity to take on more and larger jobs that demand precision machining and low scrap/rework rates.
