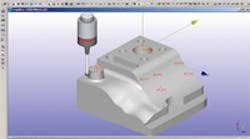
Marposs Corp. (www.marposs.com) now offers newly updated 3D Shape Inspector part measurement software for moldmaking machine tools with as many as 5 axes, and newly enhanced software for its Mida Laser tool setters for gauging and updating the cutting radius of moldmaking tools such as ballnose end mills.
Installed on the machine tool’s CNC or on a separate PC, Marposs said its 3D Shape Inspector (3DSI) software enables moldmakers to turn a machining center or milling/turning machine into a virtual CMM by providing rapid verification of workpiece form and accuracy without removing the part from the machine.
The operator receives instant part quality feedback that can allow immediate part rework and printout of simple, self-explanatory reports.
Marposs said onmachine measurement saves time in removing the part for inspection in a lab, then refixturing and resetting the part when additional machining is required. Marposs recently updated its 3DSI software for use with machine tools with 4-axis and 5-axis capabilities.
New tool gauge cycles for use with Mida Laser systems include a program designed to allow moldmakers to obtain the maximum tool life of ballnose end mills and other cutting tools.
The new tool gauge cycle for gauging the radius of the tool’s cutting edge checks that the shape of the tool is correct to obtain its error compared with the theoretical shape.
Sharad Mundra, Marposs Mida Probing product manager, notes that moldmaking tools such as ballnose end mills experience nonuniform wear compared with standard tools that tend to wear at the center and on the diameter.
“Because different points of the ballnose end mill are in contact with the part throughout the machining program, tool wear is not distributed evenly along the tool radius,” Mundra said.
“As the tool cuts, we know exactly which points of the tool are cutting, so the operator can pick up the real value at different points on the cutter to compensate for wear,” he added.
The Mida Laser 75 software feature enables mold manufacturers to use their ballnose end mills to the fullest extent and not use an average value for calculation. The new software feature is ideal for use with cylindrical mills with spherical heads, coned milling cutters with spherical heads and disktype milling cutters with round inserts.
