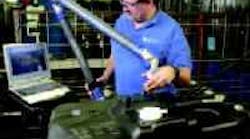
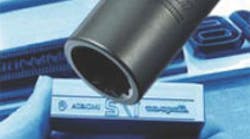
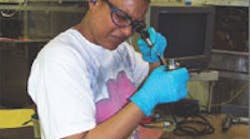
Kautex maintains quality with a FaroArm measuring device when running 7,100 plastic automotive gas tanks/day.
A FaroArm lets Kautex make precise adjustments to its blow-mold tooling setups.
Kautex in Avilla, Ind., manufactures plastic fueltanksystems, automotive clearvision systems, blow-molded functional components, modular fluid-management systems, and fuelfiller assemblies. The company produces 1.4 million lightweight plastic gas tanks yearly for customers such as GM, DaimlerChrysler, Mitsubishi, Honda, and Toyota.
Holding dimensional tolerances — ±0.196 in. on flat areas, ±0.118 in. elsewhere — for production runs of 7,100 tanks/day requires almost constant monitoring, in addition to adjusting cooling fixtures for the blow-molding process. For both these tasks, Kautex relies on a versatile measuring instrument called the FaroArm.
The lightweight FaroArm, employing optical transducers, measures within its spherical reach to an accuracy of 0.001 in. Kautex operators move it from place to place in minutes and gather data by touching its stylus to significant points on a tank and then pressing a button.
An associated computer records collected data via CAM2 Measure software, which uses a tank CAD file as a measuring template during spot checks. When measured points exceed the allowable range, the software alerts operators and records the defect.
According to David Treckman, manufacturing engineer at Kautex, the FaroArm significantly impacts the shop's tooling setup. He explains, "For cooling fixtures, the first step is referencing a 0,0,0 point on the mounting plate and measuring all pads that touch the tank. Step two is measuring a finished tank. Where dimensions are out, we make the appropriate adjustment in the cooling fixture at the point of contact. Then lastly, we make more tanks, measure them, and repeat as necessary until dimensions are within specifications."
With the FaroArm, Treckman knows exactly where a pad is prior to an adjustment and can verify the amount of movement in all directions once the adjustment has been made.
Using old techniques, a big CMM and mechanical gages, this process took six days, as opposed to three with the FaroArm.
In product verification, Kautex makes a lot more spot checks than it did before because the FaroArm is faster than the shop's old methods. "We even use the FaroArm as an attribute gage where surfaces are only required to fit some minimum or maximum dimension," says Frank Olbertz, engineering manager at Kautex. "We set the software to work as a go/no-go gage, but now, we get a number to record."
Prior to FaroArm, the shop measured prototypes and spotchecked occasional production parts with its CMM. However, fewer checks were made because the machine was slow. During production, mechanical nonmeasuring attribute gages indicated if points on a tank met minimum or maximum dimensions, and tooling setup involved a lot of measuring with mechanical implements such as rulers, shims, and verniers.
Kautex engineers continue to use the shop's CMM for extremely detailed images of a few tanks from the production stream. This information, combined with data from spot checks using the FaroArm, lets engineers watch for drifts in product quality.
Faro Technologies Inc.
Lake Mary, Fla.
faro.com
