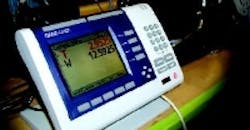
Instron's automated steel inspection system relies on a Gage-Chek gage amplifier.
Four probes connected to the Gage-Chek system speed steel specimen measuring to 300 per 8 hours.
A major steel maker enlisted Instron Corp. to design and build a tensile testing apparatus that would measure the thicknesses and widths of steel samples automatically. So Suzanne de Lemos-Williams, senior mechanical engineer at Instron (www.instron.com), and her colleagues geared up for the demanding project that involved designing a high-precision horizontal specimen measuring system.
The system had to be robust and reliable enough to handle hundreds of large steel specimens precisely on a daily basis. It would have to function in a hostile manufacturing environment, be integrated with the steel-manufacturing equipment, be easy to use and provide 24/7 lights-out operation. The customer needed it within one month, and Instron found its challenge was to determine the gaging device that would be at the heart of the automated system it was designing.
"We considered several solutions, but each fell short in some way. One couldn't deliver the required ±5-micron accuracy, while another lacked the capacity to handle the hundreds of daily samples that range from 2 mm (0.0787 in.) to 30 mm (1.18 in.) in length and that weigh as much as 4 lb," says de Lemos-Williams. When all was said and done, Instron based its automated system on the Gage-Chek gage amplifier system from Metronics Inc. (www.metronics.com). The system provided the required accuracy, real-time go/no go gaging, a flexible intuitive user interface and direct output of SPC. It also offered capability for handling four probe inputs simultaneously, actually half of its eight-probe capacity.
Using Instron's automation system with Gage-Chek, the customer's entire steel inspection and tensile testing process now takes about two minutes. Prior to this, the company handled each part and, using digital calipers, took six measurements for width and thickness, then recorded the values manually.
Steel company personnel fully test racks of 66 specimens in about 120 min, gaging approximately 300 specimens in an eight-hour shift. "Previously, with the manual process, even on a good day each shift could test up to about 100 pieces. We've helped the company achieve a 300 percent gain in productivity, together with greater accuracy, flexibility and repeatability," says de Lemos-Williams.
During operation of Instron's system, storage racks hold bar-coded steel specimens, and a barcode reader determines the handling and gaging routine for each specimen, whose dimensions and fixturing requirements can differ widely.
A Fanuc LR-mate 100ib robot picks up a specimen and places it in a pneumatic workstation, the system automatically centers the specimen, then an anodized aluminum clamp moves in to secure the part for measuring as a table indexes to obtain three required measuring positions. The Gage-Chek measures thickness and width, automatically computes the values and downloads them to a PC.
