New software may change how companies view digital inspection.
PowerInspect's on-screen feedback lets users know if there is a discrepancy between an object's 3D CAD model and collected data points.
PowerInspect allowed Lotus to speed production of its popular sportscar.
The complete body side of a car can be checkd in 10 min. using a Faro arm and PowerInspect software.
Historically it's been difficult to combine the information gained from different measuring technologies such as coordinate measuring machines, touch probes, scanners, and photo grammetry. Inspection using these methods can be time-consuming and costly. To further complicate matters, most customers now provide CAD models to their suppliers, rather than drawings,and require that inspections be made against these models. But a flexible new software could over-come these problems, integrating inspection information from a number of sources.
What started as a custom program for a French press tool manufacturer has developed into a flexible and universal inspection package for 3D CMMs, inspection arms, and other data-gathering and machines. The program, PowerInspect, from Delcam International, Birmingham, UK runs on Windows NT and 2000 operating systems.
Designed for production environments, PowerInspect is aimed at manufacturers of complex parts and tools as well as quality-assurance professionals. The software has proven useful for prototypes, batch parts, molds, tools, patterns, electrodes and master models.
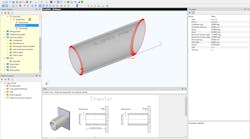
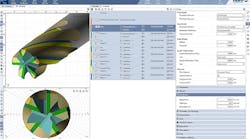
It works by recording not only an object's measurements but also the coordinates of each data point. The location of these points is then compared to the object's original 3D CAD model. Variations between the collected data and the CAD model are then highlighted. Displays of the measured points lets users see any problems instantly, and on-screen feedback, arrows, and color-coding immediately alerts users to problems.
It's the ability of the software to provide quick comparisons, as well as its portability, that caught the attention of Lotus Cars, Norwich, UK, which uses the program to compare tooling, prototype parts, or production samples, with CAD data.
With demand for Lotus' latest car model high, the automaker needed to speed production. Using PowerInspect with a Faro arm has let it do so.
"With PowerInspect, we can check a complete body side of a car within 10 minutes. That includes the time it takes to set up the Faro articulated measuring arm alongside the production line, set the datum, and check selected points and sections on each of the individual panels that make up the complete body side," says Chris Balls, engineering workshop supervisor at Lotus.
The portability of the Faro arm/PowerInspect combination provides another advantage for Lotus. "We can inspect jigs and fixtures directly with the CAD model at the production point and make any adjustment there and then," remarks Balls. "We also do a final verification once they are set up." Lotus also verifies the positions of brackets, hinge points, glass channels, door handles, and more simply by loading the different CAD files into PowerInspect as the door is assembled.
The universality of the system stems from its ability to import the 3D models it uses for comparisons from a number of sources. All the mainstream CAD packages are supported including Catia, CADDS, Pro/Engineer, Unisurf, IGES, and VDA formats. In addition, PowerInspect has an embedded CAD module that displays models as 2D or 3D wireframes, and the software provides users six standard views, two isometric views, and a user-definable view, each of which can be dynamically rotated. A graphical user interface lets users quickly grasp the dimensional situation of any part. When an object is rotated in any axis, the callout arrows are automatically re-drawn for clarity. No arrow ever crosses another.
Helping the old and the new
Because PowerInspect can work with different types of data from a number of sources, it can enhance many pieces of older equipment, particular early-model CMMs. When it comes to precision measurements across large dimensions, conventional CMMs have drawbacks, which are the reports they produce. Such reports are often statistical abstracts that are difficult to use with a CAD system. With the growing use of nontraditional measuring systems, such as lasers and photogrammetry, which are easier to use with a CAD system, many CMMs are collecting dust. A PowerInspect retrofit lets CMMs enter the digital age andextends the useful life of a shop's investment.
Reverse engineering capabilities also let PowerInspect collect point data from a physical model, place it into a CAD program, and then use those points to create cross-sections or wireframe information. This information can be used to form a CAD model.
Bringing new life to older equipment is one of the bonuses PowerInspect provided GKN Westland, a UK-based helicopter manufacturer. The company feeds quality-assurance data from its production lines to its suppliers of skin panels, fixtures, and airframe components. In the past, the company struggled with inspecting large, intricate parts while trying to coordinate data from various measuring methods. PowerInspect has proven to be a way of tying all the information together.
GKN uses photogrammetry to collect precision measurements. This technique uses reflective data points and targets on the product or tool. These points are highlighted by a flash unit and recorded as a digital image that is used in one of two ways. Two cameras can be used to photograph each point being measured. A triangulation helps calculate the position of the point from the two pictures for a real-time measurement. Another method uses a single camera to take a series of pictures of an object. The points being measured are again marked with reflective targets. Thousands of points of data, or clouds of data, can be collected quickly in this way and later analyzed.
PowerInspect, unlike some software, can analyze point clouds in a matter of seconds, allowing it to work with large sets of data. The software highlights just the points that are out of tolerance to help users easily read such mass quantities of information.
PowerInspect analyzes GKN Westland's data, which I is then loaded onto the helicopter manufacturer's CMM. Combining PowerInspect with photogrammetry means GKN's measuring equipment can be assembled around an aircraft without delaying manufacturing.
"We can continue on another section of the aircraft while a measurement is taking place," says Dave Wakely, central tooling manager. "In the past, everything had to stop as any movement of the part being measured would impact results, and this meant a delay in production or that we had to wait for the end of a shift before we took measurements."
The latest updates to PowerInspect will make the inspection process even more integrated by providing on-machine inspection.
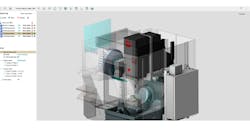
For the small shop that must do quality inspections, but doesn't have a CMM, PowerInspect can be run on machine tools. Delcam has recently added support for CNC-based inspection techniques. This lets a CMM operator carry out a manual inspection of critical features and measurements on a sample component.
Once these initial measurements are complete, the software remembers the probe path and automatically drives the CMM during inspection of the same component. The software will then repeats all the calculations necessary to produce the inspection report for each part.
The stored path can be followed in sections if future inspections are focused on just some of the original features. Probe paths can also be modified when needed, either to add to, or to take away from, the set of points being inspected.
PowerInspect's CNC capability can also move the probe automatically when taking inspection points at specified intervals on a surface or along a section of the mode, and points can be added or removed, ensuring that measurements can be taken of any critical geometry.
In both modes, there is support for changing the probe head, the probe, or the stylus during the inspection. If need be, the probe head can be rotated under CNC control, while moving from point to point.
